If the grid went down tonight, how many of us could still cook a proper meal? Most people wouldn’t last a day without power or fuel. Put those together, and you have the perfect recipe for disaster. But it doesn’t have to be that way.
Matter of fact, you don’t even need a stove, oven, or even electricity to make yourself a full and satisfying meal. There are a few tricks you can use without spending a dime or turning on a single burner.
Let me show you how:
The Ingredients You Will Need:
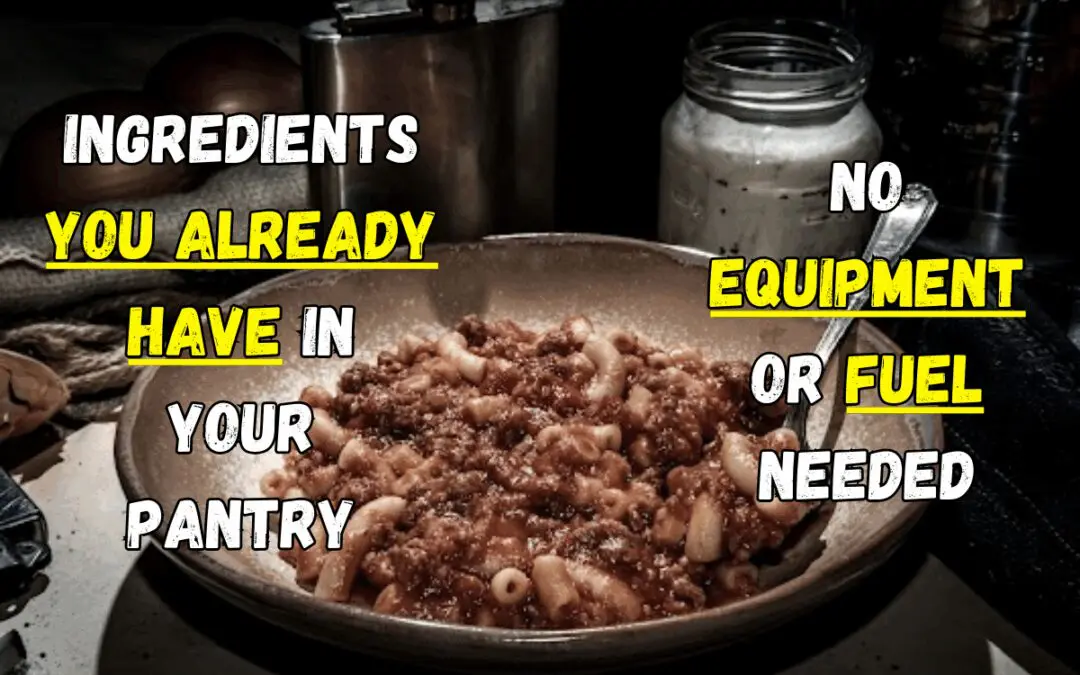
The best part about this meal is that the ingredients are simple, common, and easy to keep on hand. You most likely already have them in your pantry.
Dry beans, rice, cornmeal, pasta, eggs, and canned vegetables form the backbone of this meal, while shelf-stable fats and basic seasonings bring it all together. But the true beauty of this recipe is how adaptable it is: you can swap ingredients depending on what’s in your pantry or what’s fresh from your coop. Missing one vegetable? Add another. No cornmeal? Use rice or pasta instead. With just a little creativity, you can make a full, satisfying meal without spending a single dime on the ingredients.
Here is the basic ingredient list:
- 1 cup dry beans (any type; soak if possible)
- 1 cup rice, cornmeal, or pasta (whatever you have in your pantry)
- 1–2 eggs (fresh from the coop)
- 1 can or jar of vegetables (corn, peas, green beans, carrots, etc.)
- 2–3 tablespoons of lard (I learned how to make Amish Lard Tallow here), bacon grease, or any shelf-stable fat

- 1 teaspoon salt
- ½ teaspoon black pepper
- Optional: dried herbs like thyme, oregano, or parsley
Equipment
You won’t need much to make this meal. A few basic tools that are easy to find around your homestead will do. You can use a simple bowl or container for mixing, and a spoon, fork, or whisk will help combine everything. You’ll also need hot water, which you can get from a kettle, thermos, or even a solar-heated container. (I’ll also show you a completely off-grid way to get your water hot in just a bit!)

Instructions
1.Soak the Beans
Cover the dry beans completely with water in a bowl or container. Let them sit several hours or overnight. Soaking softens and swells the beans, helps them blend with the grains, and makes them easier to digest without cooking.
2.Prepare the Grains
Add rice, pasta, or cornmeal (up to you) to the soaked beans. Pour in enough hot water to fully cover grains or make a porridge with cornmeal. Stir occasionally to prevent clumping. Adjust water if needed so the mixture is soft, but not soupy.
3.Cook the Eggs
If you have a gentle heat source (solar, thermos, or fire), whisk eggs and stir into the hot bean and grain mixture until set. The eggs add protein and richness. If no heat is available, use pre-cooked hard-boiled eggs. Chop them finely and fold them in to distribute evenly.
4.Add the Vegetables
Stir in canned or jarred vegetables. Chop large pieces for uniform texture. Mix thoroughly so every bite has a balance of grains, beans, eggs, and veggies. Optional: drain excess liquid from canned vegetables if needed.
5.Season and Add Fat
Add lard, bacon grease, or any shelf-stable fat. Sprinkle salt, pepper, and optional dried herbs like thyme, oregano, or parsley. Stir well to coat all ingredients. Taste and adjust seasoning for flavor balance.
6.Let it Sit
Cover the mixture and let it rest 10–15 minutes. Allows grains and beans to fully absorb water. Flavors meld together, creating a richer, more cohesive meal.
7.Serve
Spoon the mixture into bowls or plates. Enjoy immediately, hot if heated, or at room temperature. You can also serve it with bread, biscuits, or cornbread.
Make It Shelf-Stable
Once your off-grid meal is prepared, you can extend its shelf life so it’s ready whenever you need it. One of the simplest ways is home canning. After cooking, spoon the hot mixture into sterilized jars, leaving about 1 inch of headspace. Seal with lids and process in a boiling water bath for 90–100 minutes, depending on your jar size and altitude.
Special Note: Please remember that pressure canning is much safer than water bath canning. Investing in a high-quality pressure canner is one of the smartest decisions you can make, given that one only costs around $75.
If you don’t have a water bath, you can also dehydrate portions: spread the mixture thin on a tray and dry in a low-temperature oven or solar dehydrator until completely moisture-free. Store in airtight containers, and you’ve got a long-lasting, ready-to-eat meal that requires only rehydration with hot water.
>>> Are You Making This Deadly Canning Mistake? <<<
Even without traditional canning, cooked beans, grains, and vegetables can be stored in airtight jars in a cool, dark place for several days—perfect for short-term emergencies. Pairing these methods with shelf-stable fats and seasonings means your meal stays nutritious, filling, and ready-to-go.
Tips & Variations
This meal is incredibly flexible, so you can adjust it to whatever ingredients you have on hand and make it feel fresh every time.
You can boost the protein content by adding canned tuna, salmon, or leftover cooked meat. Even small amounts of meat or fish can make the meal more satisfying and give it a richer flavor.
Simple pantry staples can make a big difference. A splash of vinegar or lemon juice brightens the flavors, a pinch of sugar balances acidity, and a dash of hot sauce or crushed chili flakes adds a little kick. Dried herbs like thyme, oregano, or parsley can also transform a simple dish into something that tastes home-cooked.
Serve it with bread, cornbread, or biscuits made from pantry flour to turn it into a hearty, full meal. This is perfect when feeding a family or when you need extra calories to get through a busy day.
For a breakfast twist, you can turn the mixture into a filling breakfast by adding extra eggs, a little milk powder, or even a sprinkle of cinnamon and dried fruit. You can enjoy it hot from a thermos or at room temperature for a quick start to the day.
If you have extra vegetables, beans, or leftover meat, turn the mixture into a thick stew. Just add a little more water, simmer with seasonings, and let it meld together. This creates a warming, one-pot meal that’s perfect for cold nights.
Fresh or frozen garden vegetables can replace canned ones, and wild herbs like dandelion greens, chickweed, or nettles can add extra nutrition and flavor. This is a great way to use what’s growing around you while keeping meals interesting.
For long-term storage or camping, you can dehydrate the cooked mixture in small portions. Rehydrate with hot water when needed, and you have a quick, filling meal with minimal effort. I learned this from the No Grid Survival Projects book, together with how to build a complete stockpile for any crisis that might appear. And truth be told, the lesson about how to make your own toilet paper rolls was a huge eye-opener. It showed how much money we lose on things we could so easily make ourselves.
Final Thoughts
Being able to cook a full, satisfying meal without electricity or modern appliances isn’t just a neat skill—it’s a survival essential. With simple pantry staples like beans, grains, eggs, and canned vegetables, combined with basic fats and seasonings, you can feed yourself or your family no matter what’s happening with the power grid.
The best part is how adaptable this meal is. You can swap ingredients, stretch it further with bread or cornbread, boost protein with canned meat or fish, and even turn it into a breakfast porridge or a hearty stew. And with home canning or dehydration, you can make it shelf-stable, so it’s ready whenever you need it.
A little planning and creativity go a long way. Knowing how to prepare nutritious, flexible meals off-grid means you’re not dependent on fuel, electricity, or even the local grocery store. You’re self-reliant, prepared, and ready for whatever comes next.
With these tips and techniques in your back pocket, you can face a power outage or any emergency with confidence, knowing you’ll always have a meal that’s filling, flexible, and completely under your control.
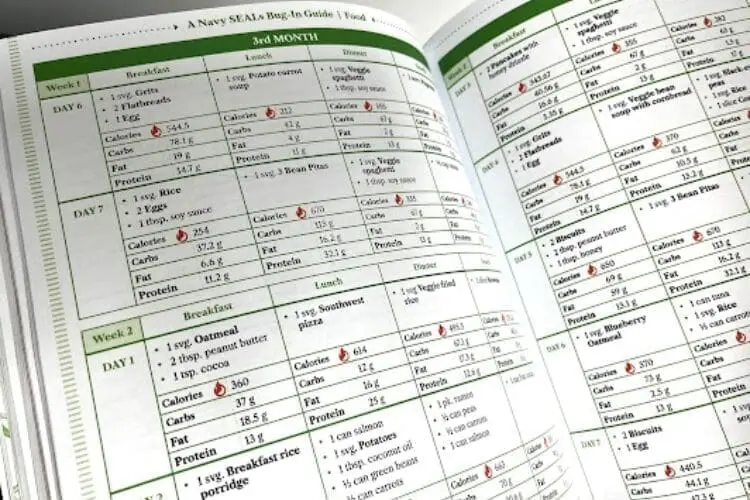
Inside A Navy SEAL’s Bug-In Guide, you will discover exactly how to build a long-lasting stockpile that needs no refrigeration. It starts with a complete stockpile that you can eat from morning, lunch, and dinner for three months. Then you’ll have another one for six months and another for a full year.
You’ll see exactly where to buy these foods so they’re as affordable as possible. You’re also going to get a day-by-day and meal-by-meal rationing plan to make sure you are not only getting around 2,200 calories a day but also the vital protein, fat, and other nutrients that will keep you healthy in the long run.
Besides what I’ve mentioned so far, here are some other things you’ll find inside:
- The Under $1 Walmart Canned Goods You Absolutely Need to Add to Your Food Reserves
- A Meal in a Jar That Can Feed You for a Week
- How to Make the Ultimate Survival Food with a 25-Year Shelf Life
- The Only Seeds You Need to Stockpile for a Crisis
- What Item You Should Remove from Your Pantry Immediately
- How to Hide That You Still Have Power Left in a Blackout
- What Great Depression Foods We’ll Be Eating Again Soon
- How to Use a Car Battery to Power Up Your Radios
- What Happens if You Take Expired Medications
And so much more!
The author has printed only a limited batch of copies this time, and once they’re gone, they’re gone for good. You can access my personal discount right here!
You may also like:
This is Why the Amish Bury Their Food
How To Build A Smoke House For Off Grid Long Term Meat Preservation (Video)
How to Clean a Cast Iron Skillet – The RIGHT Way
Don’t Throw Away Used Cooking Oil! Do This Instead
8 Foods You Should Never Keep in a Fridge


COMMENT
COMMENT
COMMENT
COMMENT
COMMENT
COMMENT
COMMENT
COMMENT
COMMENT
COMMENT
COMMENT
1
COMMENT
COMMENT