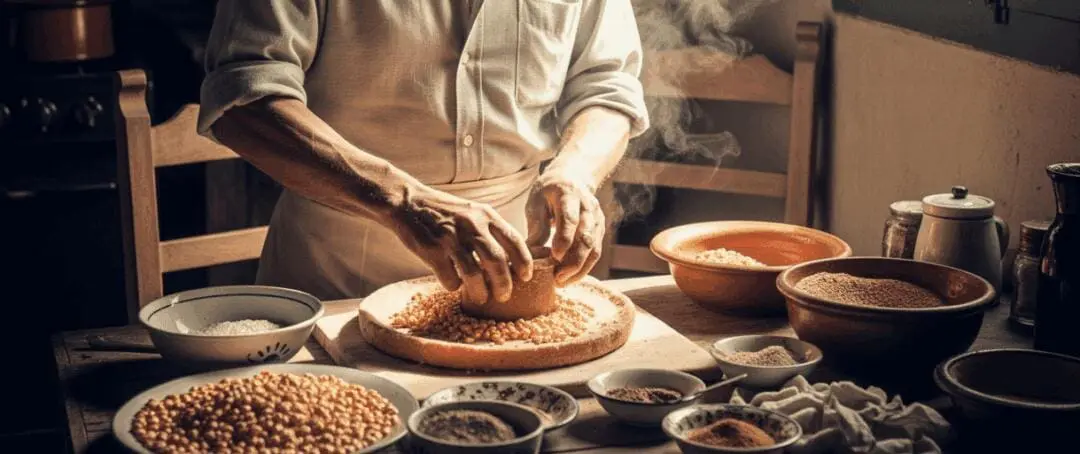
Aztec armies marched for weeks; messengers ran hundreds of miles without supply trains.
They needed calories that wouldn’t spoil under a scorching sun or in a damp jungle.
Bulk was the enemy, spoilage was a death sentence.
Their solution was pure, brutal efficiency: pack maximum energy into the smallest, most stable form possible.
Moisture invited rot, so they kicked it out completely.
Why This Survival Cake Defies Decades
Forget complicated chemistry.
The core secret is denying the enemy its lifeline.
Microbes – mold, bacteria, yeast – absolutely require water to survive and spoil food, just like we need it to live.
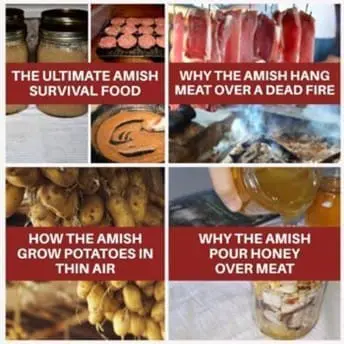 If you want to learn how to preserve food for decades for the pennies on the dollar, all you need to do is learn from the only people who have been living without electricity, toxin-ridden foods and modern conveniences for all their life. Here, you’ll get access to several never-before-seen videos, where you can see:
• The deadly canning mistake the Amish never make (but most Americans do… without even realizing it)
• Why the Amish put this single leaf in their flour
• How they make powdered eggs
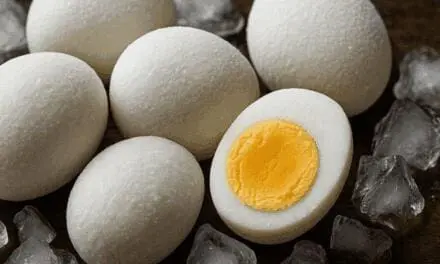
• How they store eggs for over a year—without a fridge, vacuum sealer, or added chemicals
And that’s barely scratching the surface of what these videos will reveal. They’re made by a former Amish who has been excommunicated for sharing these secrets with the outside world. So try and check them out before the videos get taken down!
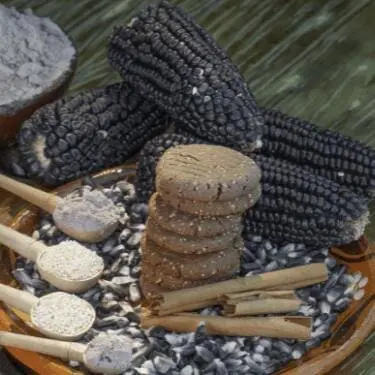
What Is Pinole Made Of?
The Aztec warrior cake’s incredible shelf life comes down to having almost no available water at all. Scientists measure this as “water activity” (aw).
Think of aw as the amount of water molecules microbes can actually grab and use. Pure water scores 1.0 aw. Most foods spoil rapidly above 0.85 aw. A properly made Aztec warrior cake plunges far below that, hitting 0.60 aw or lower. It creates a microbial desert where nothing can thrive or even survive. The Aztecs achieved this extreme dryness through relentless techniques and ingredient synergy.
Sun baking on scalding stones or extended drying under intense sunlight for days drove out moisture at its source.
Modern homesteaders can replicate this reliably using a dehydrator set low, ideally under 115°F (46°C), running for extended periods. Patience is non-negotiable here.
Agave nectar (or true, thick honey) plays a vital role because it’s hygroscopic; its unique sugars actively pull in and tightly bind water molecules, making that water useless to microbes. It’s nature’s own water-locking agent.
Chia seeds contribute crucially when mixed; they hydrate slightly and form a thick gel. As the cake fully dries, this gel transforms into a tough physical barrier across the surface, significantly slowing down oxygen and environmental moisture from seeping back in – think of it as edible armor.
The nixtamalization process applied to the corn does more than just unlock nutrients; it fundamentally alters the corn’s structure, making the starches less accessible and the entire food matrix more inherently resistant to breakdown and microbial attack, providing a critical foundation of stability. Evidence also suggests storing the finished cakes in specific porous clay vessels, sometimes sealed with resin or clay lids.
These ancient pots likely acted like humidity regulators, absorbing minuscule traces of residual moisture and maintaining an ultra-dry micro-environment inside – a brilliant low-tech solution echoing modern principles.
The combined result is a food so fundamentally dry and hostile to decay organisms, that time becomes almost irrelevant.
Pinole Recipe: DIY Decade-Ready Aztec Warrior Cake
Pinole doesn’t ask for much. Just the right things. Start with nixtamalized heirloom corn, the kind that holds up to real work. Toasted amaranth folds in a nutty richness, while chia seeds offer endurance that stretches for miles.
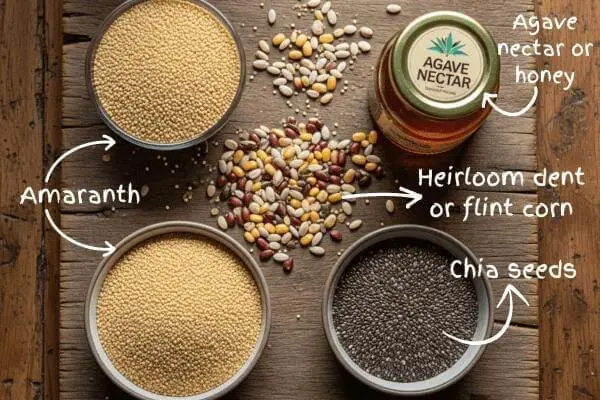
A touch of agave nectar binds it all, lending just enough sweetness to carry the flavor without spoiling the shelf life.
Grow It If You Can
This isn’t about exotic imports. Focus on core ingredients you can source or grow yourself.
Amaranth is your friend. Plant it late spring after frost danger passes. It thrives in heat and poor soil, shooting up tall with striking red or gold seed heads. Harvest when seeds feel hard; thresh them like tiny grains.
Heirloom dent or flint corn is essential for proper nixtamalization. Skip sweet corn varieties; you need field corn. Grow it like regular corn, letting the ears dry fully on the stalk before harvest. Processing corn correctly is non-negotiable. You need food-grade calcium hydroxide (pickling lime). Never use builder’s lime or quicklime – they are toxic. Find it at brewing supply stores, some Latin markets, or online.
Agave nectar is ideal for maximum shelf life. Pure, raw syrup works best. If unavailable, very thick, raw local honey is the next best option, though understand it might reduce the maximum potential shelf life slightly compared to agave.
Chia seeds are readily available; ensure they’re fresh and whole. Forget the volcanic ash or insects unless you’re deeply committed to historical experimentation; the core four ingredients deliver the proven function.
How To Make Pinole
It all starts with the corn. Not just any corn, but proper field corn — the kind that’s built for sustenance, not sweetness. Before you can turn it into pinole, it needs to go through nixtamalization — the ancient process that unlocks its full nutritional power and makes it ready for the journey ahead.
1.Nixtamalize the Corn
This step is foundational. Start with dried corn kernels. For every pound (about 2 cups) of dried corn, use 1 tablespoon food-grade calcium hydroxide and 2 quarts water. Dissolve the lime completely in cold water first in a non-reactive pot (stainless steel or enamel).
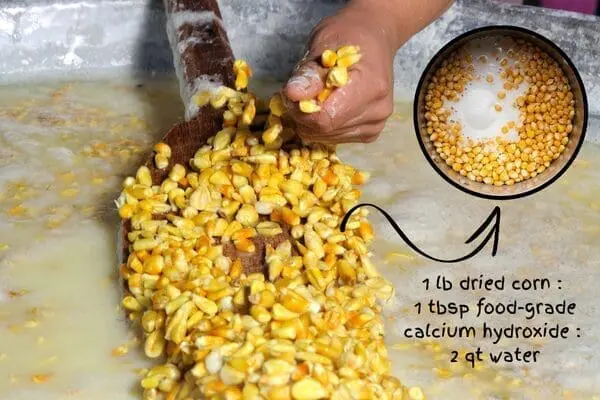
Add corn, bring to a simmer (never a rolling boil), and maintain a bare simmer for 30-50 minutes. Turn off heat, cover, and soak 8-12 hours or overnight. Drain, rinse thoroughly under cold water while vigorously rubbing kernels to remove the softened hulls (pericarp). The kernels will feel slippery. Rinse until water runs clear – this removes excess lime. You now have nixtamal, or hominy. Drain well.
2. Grind the Base
Grind the rinsed, drained nixtamal and your amaranth seeds together. A meat grinder with a fine plate, a powerful food processor, or a dedicated grain mill works best.
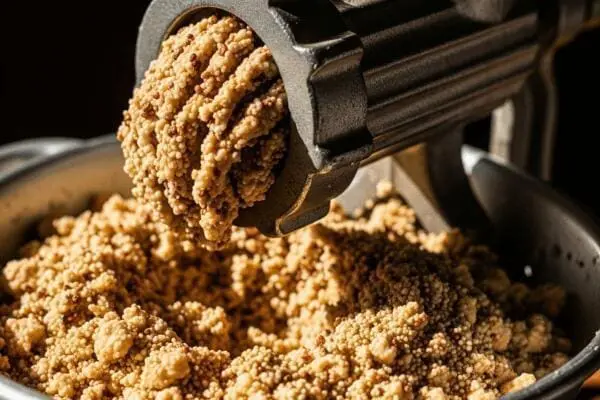
You want a coarse, damp meal, almost like thick polenta.
3. Mix the Paste
Combine the ground nixtamal/amaranth mix, chia seeds, and agave nectar (or honey) in a large bowl. Use roughly 1 part agave nectar to 3 parts dry mix by volume as a starting point. Mix thoroughly. You need a dense, stiff paste – thicker than bread dough.
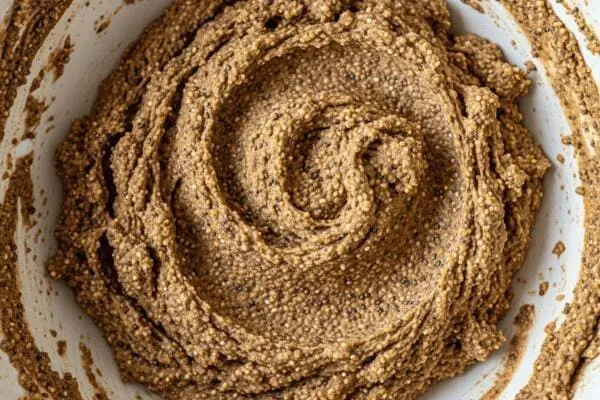
Add small amounts of water only if absolutely necessary to incorporate dry bits, but remember: water is the enemy. The chia will start absorbing moisture and binding the mix.
4. Spread Thin, Dry Relentlessly
This is where longevity is won or lost. Spread the paste paper-thin(no thicker than 1/8 inch) onto dehydrator trays lined with non-stick sheets or parchment. A silicone baking mat on a regular oven tray works if using an oven on its absolute lowest setting with the door propped open.
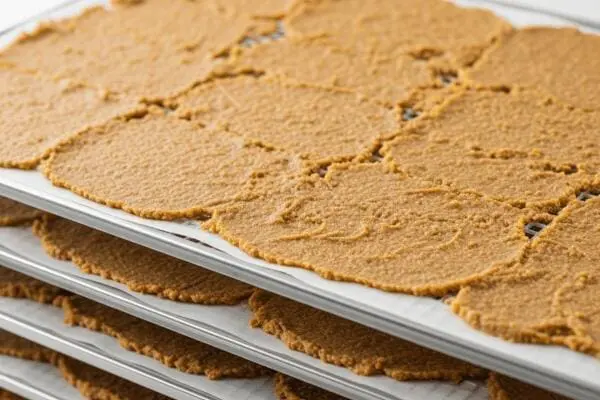
Critical Low Moisture is the goal. Use a dehydrator set to 110-115°F (43-46°C). This low temperature preserves nutrients while driving out water. Drying takes days, not hours. Expect 48-72 hours minimum, possibly longer depending on humidity and thickness. Rotate trays if needed.
5. Test Ruthlessly
It must be rock-hard. Bend a piece. If it flexes at all, it contains dangerous moisture. Keep drying. It should snap cleanly like a piece of slate or thick pottery shard.
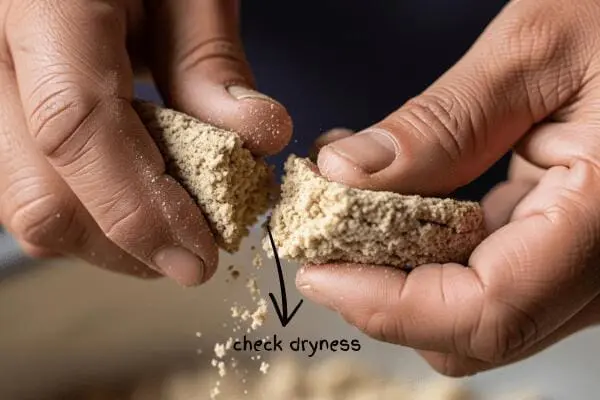
Any hint of flexibility means microbes could survive. Don’t compromise. This stage is non-negotiable for true decade-readiness.
Storage
All that effort means nothing with sloppy storage. Oxygen absorbers are mandatory. Place your bone-dry cake pieces inside appropriately sized mylar bags (thickness matters – use 5 mil or thicker). Add oxygen absorbers rated for the bag volume (usually 300cc for a gallon bag).
Seal the mylar bag airtight using a heat sealer or a very hot iron on a protected surface. Squeeze out as much air as possible before the final seal.
Place these sealed mylar bags inside food-grade buckets with tight-fitting, gasket lids. Store these buckets in the coolest, darkest, driest place you have – a root cellar is ideal, a basement corner away from pipes works, or a dedicated pantry closet. Avoid temperature swings.
For ultimate longevity: After the initial drying and before bagging for long-term storage, vacuum-seal individual portion sizes of the rock-hard cake. This minimizes air exposure every single time you access your stash. This is the homesteader’s gold standard for locking in that decade.
Inside A Navy SEAL’s Bug-In Guide, you will discover exactly how to build a long-lasting stockpile that needs no refrigeration. It starts with a complete stockpile that you can eat from morning, lunch, and dinner for three months. Then you’ll have another one for six months and another for a full year.
You’ll see exactly where to buy these foods so they’re as affordable as possible. You’re also going to get a day-by-day and meal-by-meal rationing plan to make sure you are not only getting around 2,200 calories a day but also the vital protein, fat, and other nutrients that will keep you healthy in the long run.
Besides what I’ve mentioned so far, here are some other things you’ll find inside:
- The Under $1 Walmart Canned Goods You Absolutely Need to Add to Your Food Reserves
- A Meal in a Jar That Can Feed You for a Week
- How to Make the Ultimate Survival Food with a 25-Year Shelf Life
- The Only Seeds You Need to Stockpile for a Crisis
- What Item You Should Remove from Your Pantry Immediately
- How to Hide That You Still Have Power Left in a Blackout
- What Great Depression Foods We’ll Be Eating Again Soon
- How to Use a Car Battery to Power Up Your Radios
- What Happens if You Take Expired Medications
And so much more!
The author has printed only a limited batch of copies this time, and once they’re gone, they’re gone for good. You can access my personal discount from the button below!

Follow these critical rules.
Never add spices, fruits, nuts, fats, or extra sugars before storage or during initial drying. These drastically reduce shelf life, attract pests, and introduce moisture. Add flavor boosters only when rehydrating or eating the cake.
Break off only what you need, keeping the main storage brick intact to minimize air/moisture exposure. Rehydration requires ample liquid; too little leaves it gritty and hard. Accept the texture reality: even rehydrated, it won’t be light or fluffy. Expect dense, hearty, porridge-like or stew-chunk texture. It delivers calories and nutrients, not culinary delight.
A Final Tip
Powder a portion of your fully dried cake in a clean coffee grinder. Store this powder vacuum-sealed. It dissolves instantly in hot water or broth for a quick, thick emergency drink. This requires pristine dryness for successful powdering.
You may also like: 
The Native American’s Food Trick That Helped Them Fight Starvation (Video)
Recipes I Made From The Lost Super Foods Book: Canned Hamburger Meat
How to Make Cowboy Bread (Lasts Months in Your Pantry)
DIY Long-Lasting Cowboy Casserole


Can this be made with store-bought dry or canned hominy?
Thanks
Walmart food? They seem to have a very, very high level of recalls ongoing!
That’s a lot of work, would be nice to try some to see if it tolerable or agrees with us before going through all this.
Does anyone make & sell this that is trustworthy?