It’s easy to plant potatoes in the ground but creating an above-ground structure can give you a higher yield in a relatively small space. This is a great solution for small yards, townhouses with only a patio, and even apartments with only a balcony.
The key is to create layers of soil and to plant the potatoes in those layers. Just as important, you need to have openings cut into the side of your box so the plant stems and leaves can emerge.
Soil composition is also important not only to nurture the plants but also to retain integrity so the soil doesn’t fall out of the gaps.
Variations on a Theme
We’re going to look at 3 basic constructions.
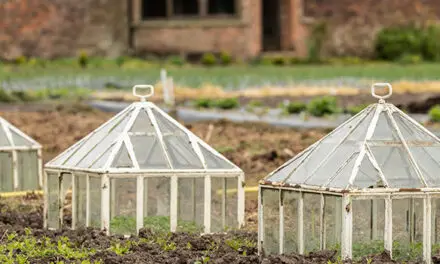
The Traditional Potato Box
The potato box is a wooden box with a large square hole cut on all 4 sides. Wooden slats are then screwed to the sides to allow the stems and leaves of the plant to emerge.
The soil is a loamy mix of peat moss and compost. Sometimes chopped hay is added to the mix to keep it from spilling out through the gaps. The potatoes are planted in layers from the bottom to the top and soil is added as the potatoes are layered up to the top.
Regular watering is critical and not only helps potato growth but keeps the soil mix solid and in place. To harvest, remove the screws from the slats and pull out the soil and the potatoes. A good way to know when it’s time to harvest is when the leaves and stems turn yellow and brown.
A potato box is perfect for a patio garden when you either have a very small yard or no yard at all.
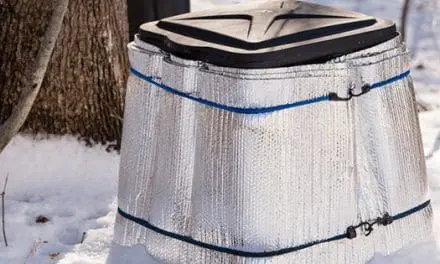
The Potato Tower
The potato tower is an ambitious variation on a potato box. If you have a yard of any size a potato tower can give you the potato yield that you would get from a large traditional potato garden planted in the ground. A key component of the potato tower is something called Fencer wire.
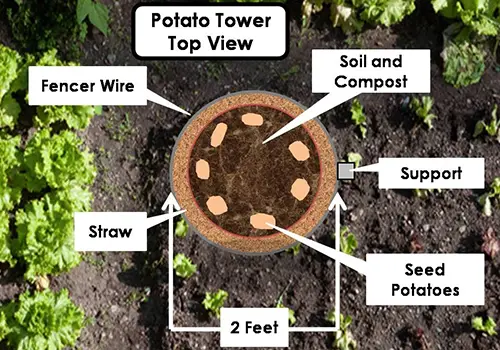
Fencer wire is what holds the soil in place while allowing the stems of the plant to emerge. The process begins with a 5 to 6-foot 2×4 pounded into the ground. The Fencer wire is then stapled or U-nailed to the 2×4 to form a large, wire tube about 5 feet high and about 2 feet in diameter. Here’s a top view of what that looks like:
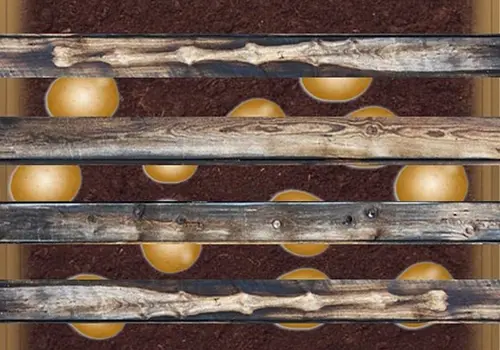
The wire tube is then filled with a combination of straw, soil, and compost. As much as possible the straw should be dropped around the sides of the wire cage and then about 6 inches of soil is dropped into the middle. Here’s what that looks like:
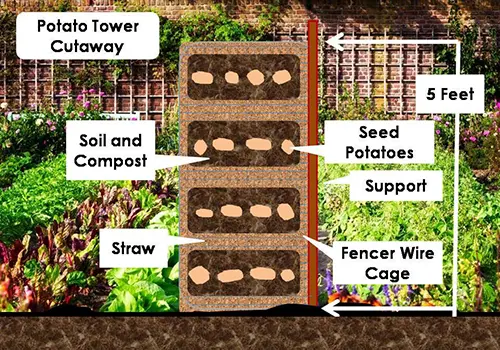
The seed potatoes need to be dropped on the soil around the perimeter as you add soil and straw. As the layers build up the process is repeated. One of the advantages of a potato tower is the easy ability to plant different types of potatoes.
When the leaves turn yellow and brown, harvesting is easy. You cut the wire with wire cutters or tin snips and remove it. You then just knock the whole tower down and the potatoes will easily break free from the soil.
Save the wire and the post for next year and either collect the soil and bag it or spread it around a traditional garden.
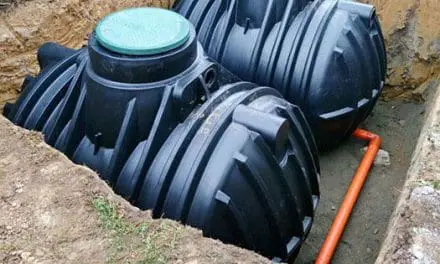
The Potato Bucket
Another variation of this concept is something called a potato bucket. This is a great solution for someone living in an apartment with only a patio for plants. In actual fact, it’s a bucket in a bucket.
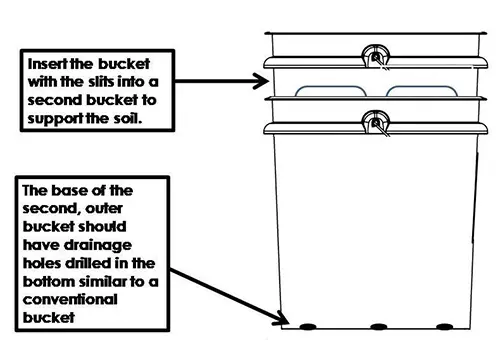
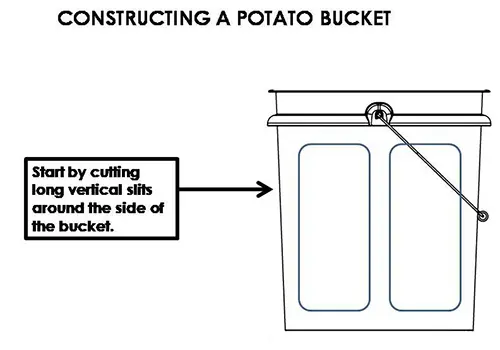
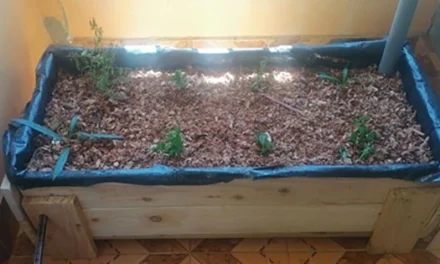
The outer bucket is both held in and contains the soil. Drainage holes are drilled into the base of the outer bucket. The inner bucket has two large slits cut into the side of the bucket and will eventually hold the soil and the potatoes. The reason for slits is to make harvesting easier.
After cutting the slits, put the inner bucket into the outer bucket and carefully fill it with your soil and potatoes. Here’s what that would look like if we pulled the Inner bucket out:
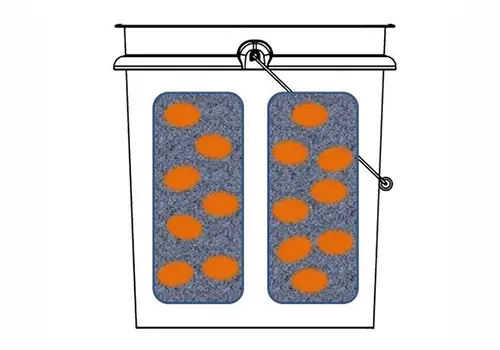
Eventually, the stems and leaves will emerge from the top of the bucket. When it’s time to harvest, pull the outer bucket out of the inner bucket and place it in a tarp. You can then proceed to pull the soil and potatoes out of the slits.
Clean and save the bucket for next year with the soil stored inside.
Potatoes 101
Any variety of potatoes will work in these configurations. Seed potatoes bought at a home center or nursery are the best bet, but potatoes you have on hand can also work.
Potatoes at home often sprout eyes and that’s a good thing when you’re planting potatoes.
Related: Forgotten Nose-to-Tail Recipes Every Homesteader Should Know
Another consideration is to slice the potatoes in half before planting. The cut side is pushed down into the soil and covered. The potato will eventually send out roots that will form into tubers and more potatoes.
Soil is also important. A loamy mix of compost, peat moss, and topsoil is a good bet. Hay is also added in various ways to encourage large potato growth.
Water is another thing to remember. A lot of water will give you larger potatoes. The soil mix will hold moisture well, but keep your potatoes watered.
Potato Storage
It’s often recommended that potatoes not be washed after harvest. This is especially true if you’re using a root cellar for storage. However, not a lot of us want to store dirty potatoes in the pantry so wash them if you must.
One other thing, keep them away from onions. Store them separately. Onions release a gas that will shorten the shelf-life of potatoes. And here is another common mistake even the most experienced homesteaders make.
Try More than One Approach
There’s no reason you can’t use all 3 of these configurations in your yard and garden. It all depends on how much room you have, and how much you like potatoes.
You may also like:
 7 Unexpected Things You Can Turn Into Compost
What Amish Would Never Store in Their Pantry, but Most Americans Do! (Video)
How to Become Invisible Wherever You Live
I Tried Eating Like a Pioneer for 100 Days and This Is What Happened
What Happens If You Spray Garlic On Your Plants


