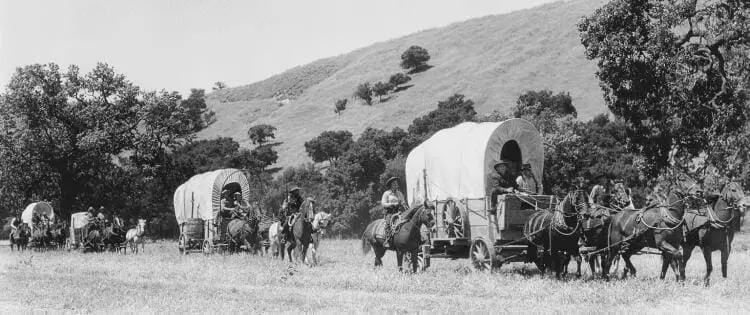
If you’ve ever wondered how pioneers lived without electricity or gas stoves, you’re about to find out. These skills saved our ancestors thousands of dollars in today’s money – and they still work perfectly. As someone who’s spent years teaching these methods at homesteading workshops, I can tell you: that they’re simpler than you’d think.
Many homesteaders don’t realize that 73% of pioneer techniques require zero modern tools. You’ll use basic items you’ve already got around your house or farm. The best part? Once you learn these skills, you’ll never need to buy expensive replacements or rely on store-bought alternatives again.
Building Cob Ovens for Bread and Pizza
A cob oven transforms simple ingredients into gourmet-level bread and pizza. I’ve built these ovens with local materials for under $100. They reach temperatures of 900°F – that’s hotter than most professional pizza ovens that cost thousands.
Your main ingredients are clay, sand, and straw mixed in a 2:3:1 ratio. The construction process takes 4 days, including drying time. Start with a strong foundation using gravel and urbanite. Shape your sand dome, then layer your cob mixture over it. The key step most builders miss is creating a 4-inch thick thermal layer using a mix of clay and sawdust.
These ovens hold heat for 6-8 hours after a single firing. The temperature curve lets you cook different foods as the oven cools: pizza at 800°F in the first hour, bread at 500°F in hours 2-3, and slow-roasted meats in the remaining time. One firing of wood costs about 75 cents and cooks enough food for 15 people.
Processing Animal Fat for Lamp Fuel

Fresh tallow or lard burns cleaner than paraffin candles and creates a steadier flame. The process requires just three tools: a large pot, water, and a straining cloth.
Start with 5 pounds of raw animal fat – beef fat produces the least smoke. Cut it into 1-inch chunks and add water at a 1:1 ratio. Simmer for 4 hours, stirring every 30 minutes. The rendered fat floats while impurities sink. After cooling, lift off the solid fat layer and strain it twice through the cheesecloth. One batch yields enough fuel for 30 lamp hours.
Your rendered fat needs proper storage to last 6 months. Keep it in sealed glass jars in a cool, dark place. The real trick lies in the wick – reed wicks burn brightest, lasting 30% longer than cotton. A properly made fat lamp produces light equivalent to a 25-watt bulb. With regular maintenance, these lamps provide reliable light without any petroleum products. The Amish people also have a lot of long-lasting recipes that use animal fat. Some of them are inside this guide.
Making Animal Glue for Repairs
Want to know how old furniture holds together after centuries? Animal glue’s tensile strength reaches 4,000 pounds per square inch. Traditional woodworkers still prefer it for its reversibility and gap-filling properties. I make batches twice yearly for furniture repairs and woodworking projects.
The process starts with soaking animal hide scraps in cold water for 24 hours. Heat the mixture slowly to 140°F and maintain this temperature for 6 hours. Strain the liquid and reduce it until it coats a spoon. The finished glue is kept for 3 months when properly stored. Test the strength by cooling a small amount – it should feel like firm rubber.
This glue outperforms modern adhesives in certain applications. It creates reversible bonds that are perfect for making instruments and making fine furniture.
The glue line becomes nearly invisible on the wood. For maximum strength, warm both the glue and the wood surfaces to 120°F before application. Unlike synthetic adhesives, animal glue lets you disassemble and repair joints without damaging the wood.
Wild Plant Identification for Edible and Medicinal Use
 Proper plant identification opens up nature’s free pharmacy and grocery store. My region contains 47 edible plants that grow year-round. Learning to identify just 10 common plants provides access to vital nutrients and basic medical remedies. The key lies in understanding 6 main plant characteristics: leaf patterns, stem structure, flower shape, growth habit, habitat, and seasonal changes.
Start with easy-to-identify plants like dandelions, chickweed, and plantain – these grow everywhere and offer multiple uses. Take detailed notes about each plant’s features in different seasons. Sample new plants in small amounts first. Wild plants contain 3-5 times more nutrients than their cultivated cousins. Dandelions pack more vitamin A than carrots, while purslane contains the highest omega-3 levels of any leafy green. A comprehensive resource for plant identification is this survival guide which has a lot of practical information and colorful pictures that will make your life easier.
Store your dried plants in airtight containers away from light. Label everything with two identification confirmations and the harvest date. Different parts of the same plant often serve different purposes – roots might be medicinal while leaves are edible.
Creating Natural Insect Repellents
Natural insect repellents work just as effectively as commercial sprays when properly made. The active compounds in certain plants repel insects for 4-6 hours per application. You’ll need specific ratios of herbs and carrier oils to match DEET’s effectiveness.
Strong repellent plants include catnip, which studies show is 10 times more effective than DEET at repelling mosquitoes. Combine 3 parts catnip with 2 parts lemon balm and 1 part lavender.
Steep these herbs in apple cider vinegar for 3 weeks. The resulting spray repels 95% of common biting insects. Add witch hazel to extend the repellent’s life to 6 months.
Related: Plant These To Keep The Pests Away
Different insects respond to different plant compounds. Ants avoid strong mint oils. Flies can’t stand eucalyptus. Mosquitoes stay away from cedar. Create targeted repellents based on your local pest population. The secret to long-lasting effectiveness lies in proper herb drying and oil infusion temperatures.
Harvesting and Storing Rainwater Without Modern Equipment
A 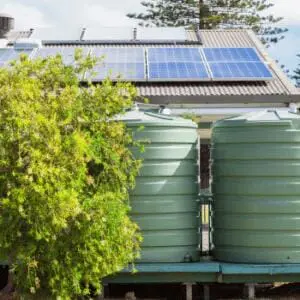 basic rainwater collection system stores 500 gallons from a single 1-inch rainfall. Traditional methods use gravity and natural filtration instead of pumps and chemicals. Your roof becomes a 1,000-square-foot collection surface that captures 600 gallons per inch of rain.
First-flush diverters made from basic PVC pipe remove 90% of contaminants from your collected water.
Design your system with multiple barrels connected in series. The first barrel catches debris, the second filters through sand and charcoal, and the third stores clean water. Raise your barrels 16 inches off the ground for every 100 feet of garden hose you’ll use – this creates enough water pressure for irrigation. You can also try a pressurized rainwater harvesting and purification system. You can find the complete instructions here.
Underground storage in clay-lined pits keeps water at a constant 55°F year-round. This prevents algae growth and reduces evaporation to near zero. A 300-gallon system waters a 2,000-square-foot garden through 30 days without rain.
Fire Starting Without Matches or Lighters
Fire is one of the most important survival skills, but most people today rely on lighters or matches. What happens if you run out or they get wet? Pioneers had several ways to start a fire without modern tools, and these methods are still useful today.
One of the oldest techniques is flint and steel. By striking a steel striker against a flint rock, you create sparks that can catch on dry tinder. Char cloth—a piece of cotton fabric burned in a low-oxygen environment—helps because it catches sparks easily. Once it smolders, you blow on it gently to create a flame.
Another method is the bow drill, which takes more effort but is completely self-sufficient. You create a wooden spindle, wrap a bowstring around it, and use the bow to spin it against a fireboard. The friction produces heat, and eventually, a small coal forms, which you transfer to your tinder bundle. The guide I mentioned earlier also has an entire chapter on how to make fire in the wild with nothing more than a few items you’ll find around you.
Other options include using a magnifying glass or a clear piece of ice to focus sunlight onto dry tinder. This only works on sunny days, but it’s a great backup method. Even steel wool and a 9V battery can create a fire in a pinch—when you touch the steel wool to both battery terminals, it sparks and ignites.
Soap Making from Wood Ash and Animal Fat
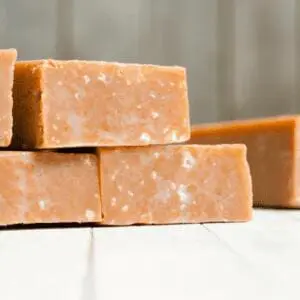 Soap is something most people take for granted. You grab a bar at the store, and that’s that. But what if the stores shut down? Pioneers made their own soap using two simple ingredients—wood ash and animal fat. It’s a skill worth learning because soap isn’t just about staying clean—it helps prevent disease and infections.
To make soap the old-fashioned way, you first need to make lye. Lye comes from wood ash, specifically hardwood ash like oak, maple, or hickory. The pioneers would soak the ashes in water and let the liquid leach out. This liquid, known as lye water, is what reacts with fat to create soap.
Next, you need animal fat, usually from pigs or cows. This fat is melted down and purified into tallow or lard. Once you have your fat and lye water, you mix them together and heat the mixture. Stirring is key—it helps the lye and fat combine, forming soap through a process called saponification.
Related: If You Have This Plant in Your Backyard, You Will Never Run Out of Soap
After cooking, the mixture thickens and is poured into molds. It hardens over time, turning into bars of soap. The longer it cures, the milder it gets. Some pioneers added herbs like lavender or pine for scent, and sometimes they mixed in salt for a scrubbing effect.
Tanning Hides for Leather
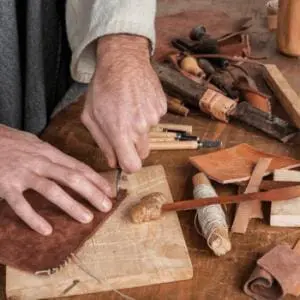 Leather was essential to pioneer life. It was used for clothing, shoes, bags, saddles, and tools. But leather doesn’t come ready-made—you have to tan it, or else it rots. Tanning is a lost skill today, but if you hunt or raise livestock, knowing how to turn animal hides into durable leather is incredibly useful.
The first step is skinning and fleshing the hide. Once the animal is skinned, you need to remove any leftover meat, fat, and connective tissue. This is done with a sharp knife or a fleshing tool. After that, you soak the hide in water for a day or two to soften it.
Now comes the tanning. There are a few ways to do it, but one of the oldest is brain tanning. Every animal has enough natural oils in its brain to tan its own hide. You mash up the brain, mix it with warm water, and rub the mixture into the hide. This softens the leather and makes it flexible. Another method is bark tanning, where you soak the hide in a solution made from tree bark. The tannins in the bark preserve the leather and give it a rich brown color.
After tanning, the hide is stretched and dried. Once dry, you work the leather by bending and twisting it to keep it soft. If you skip this step, it’ll turn stiff like rawhide. Some pioneers would smoke the hide over a fire, which helped waterproof it and keep bugs away. A properly tanned hide can last for decades.
Building and Using Root Cellars
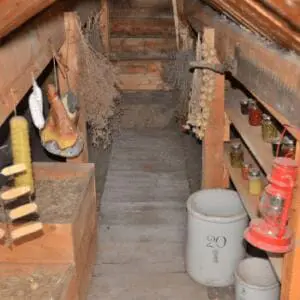 Long before refrigerators, pioneers used root cellars to keep food fresh year-round. These underground storage spaces naturally regulate temperature and humidity, making them perfect for storing vegetables, fruits, and even dairy products. Today, this skill is fading, but it’s still one of the best ways to store food without electricity.
A root cellar works because the earth insulates it. Underground temperatures stay cool in the summer and above freezing in the winter. This keeps food from spoiling too fast. A good root cellar is dug into a north-facing hillside or built underground with thick stone or wooden walls. Ventilation is key—small air vents allow excess moisture to escape so food doesn’t rot.
Pioneers stored potatoes, carrots, onions, beets, apples, and even fermented foods like sauerkraut in their root cellars. Different foods need different setups. Potatoes and carrots are best buried in damp sand, while apples should be kept separate since they release a gas that makes other produce spoil faster. Some people even stored milk, butter, and cured meats in their root cellars, keeping them fresh longer.
Beyond food storage, root cellars are protected against storms, extreme heat, and even wildfires. Some pioneers even used them as emergency shelters. Today, homesteaders and off-grid folks are reviving the practice. A well-built root cellar can cut down on food waste, reduce grocery bills, and keep a family fed through winter.
If you’ve got the space, building a root cellar is one of the smartest investments for food storage. Even a small, partially buried barrel or an old fridge dug into the ground can work as a makeshift root cellar. The key is using what you have to create a cool, dark, and well-ventilated space. If you don’t know where to start, this is the blueprint for a root cellar that doubles as an underground bunker, you can build yourself with less than $400.
Making Vinegar from Fruit Scraps
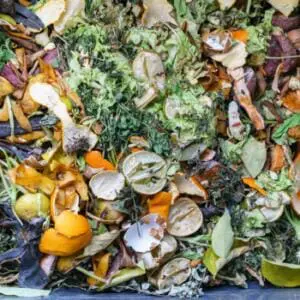 Vinegar wasn’t always something you grabbed from the store. Pioneers made their own, using fruit scraps, water, and time. Learning this skill today means you’ll always have vinegar on hand for food preservation, cleaning, and medicine—and it costs next to nothing!
The process is simple. You take apple peels, cores, or any overripe fruit, put them in a jar, and cover them with water. To speed things up, add a little sugar or honey. Then, cover the jar with a cloth to let air in but keep bugs out. Over time, natural bacteria turn the fruit sugars into alcohol, and then into vinegar.
Fermentation takes a few weeks to a couple of months. You’ll know it’s ready when it smells strong and has that tangy vinegar taste. At this point, you strain out the fruit scraps, bottle the liquid, and let it age. The longer it sits, the stronger the flavor. Some pioneers kept a “mother of vinegar,” a jelly-like mass of bacteria that helps jump-start new batches.
Homemade vinegar isn’t just for cooking. It’s a natural preservative used for pickling vegetables and making sauces. It’s also an effective cleaner and disinfectant—many pioneers used vinegar for washing dishes, cleaning wounds, and even treating sore throats. Apple cider vinegar was especially prized for its health benefits and used as a tonic for digestion and colds.
Making vinegar is one of the easiest ways to use up fruit scraps that would otherwise go to waste. Once you learn how you’ll never have to buy vinegar again, and you’ll always have a natural, multipurpose ingredient on hand.
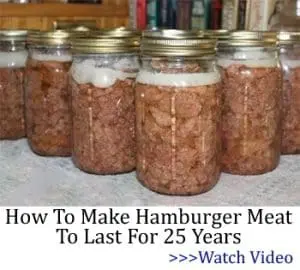
Preserving Meat Without Refrigeration
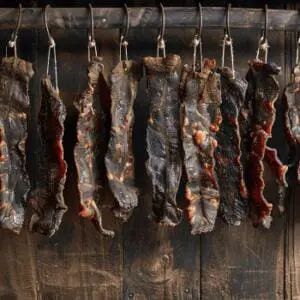 Before freezers, pioneers had to get creative to keep meat from spoiling. They used methods like smoking, salting, drying, and rendering fat to preserve meat for months—or even years. These techniques are still useful today, especially for off-grid living or emergency preparedness.
One of the most common methods was salt curing. Pioneers would rub meat—usually pork or beef—with a heavy layer of salt and let it sit for weeks. The salt drew out moisture and kept bacteria from growing. Sometimes, they added brown sugar and spices for extra flavor. Once fully cured, the meat could be stored in a cool, dry place for months.
Smoking was another way to keep meat fresh. After curing, the meat was hung in a smokehouse and exposed to slow-burning wood, like hickory or applewood. The smoke added flavor while also acting as a preservative. Jerky was made by slicing meat thin, salting it, and drying it completely—either over a fire, in the sun, or later, in an oven.
Another old-school method was pemmican, a survival food made from dried meat, animal fat, and sometimes berries. It was packed with calories and lasted for years without refrigeration. Trappers, hunters, and Native Americans relied on it for long journeys.
Pioneers also preserved meat in lard, which created an airtight seal to keep bacteria out. Cooked meat was packed into a crock and then covered in melted fat. This method, called potting, worked especially well for small game and poultry.
These traditional meat preservation methods are still valuable today. If the power goes out or you want to store food without relying on a freezer, knowing how to cure, dry, or store meat in fat is a game-changer.
Cooking on a Wood Stove or Open Fire
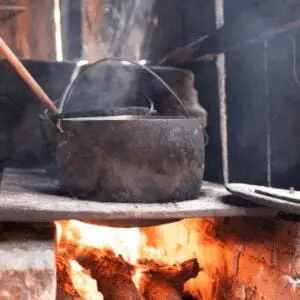 Before gas stoves and electric ovens, pioneers cooked every meal over an open fire or on a wood stove. This wasn’t just a survival skill—it was an everyday necessity. Today, most people wouldn’t know where to start, but learning how to cook without electricity is a skill worth reviving.
Cooking on a wood stove was common in pioneer homes. These stoves provided heat in winter and had an oven, a stovetop, and a warming shelf. Temperature control wasn’t as easy as turning a dial—you had to manage the fire, adjusting logs or coals to regulate heat. Some pioneers used cast-iron Dutch ovens to bake bread right inside the stove.
For those traveling west or living in log cabins, cooking over an open fire was more common. They used tripods, hanging pots, and cast-iron skillets to cook everything from stews to cornbread. Flat stones heated by the fire made great cooking surfaces for tortillas or biscuits. The key was knowing how to control the flames and coals for even cooking.
Related: No Electricity Cooking Techniques You Need To Know By Heart
Some pioneers even dug earth ovens, lining them with stones to trap heat. They would place food inside, cover it with hot coals, and let it slow-cook for hours. This method was great for roasting meat, baking bread, or cooking large meals without needing constant attention.
Cooking without modern appliances teaches patience, fire control, and resourcefulness. Whether you’re homesteading, camping, or preparing for power outages, knowing how to make a hot meal over a fire or wood stove can make a huge difference. Plus, there’s nothing quite like the taste of a cast-iron skillet meal cooked over an open flame!
Why the World Needs Pioneer Skills Now More Than Ever
Our modern systems face increasing strain from natural disasters, power outages, and supply chain disruptions. Pioneer skills provide real solutions that work regardless of external circumstances. These methods succeeded for centuries before modern technology existed.
Recent events have shown how quickly store shelves are empty and utilities fail. Self-reliant skills reduce your dependence on fragile systems. They save money too – implementing just three pioneer techniques can cut household expenses by 25% on average.
So which skill are you gonna learn first?
You may also like:
 DIY Meat Powder That Can Last 5 Years
The Most Powerful Painkiller That Probably Grows in Your Own Backyard (Video)
Seed Mistakes To Avoid At All Cost
These Animals Are Stealing Your Chicken Eggs


