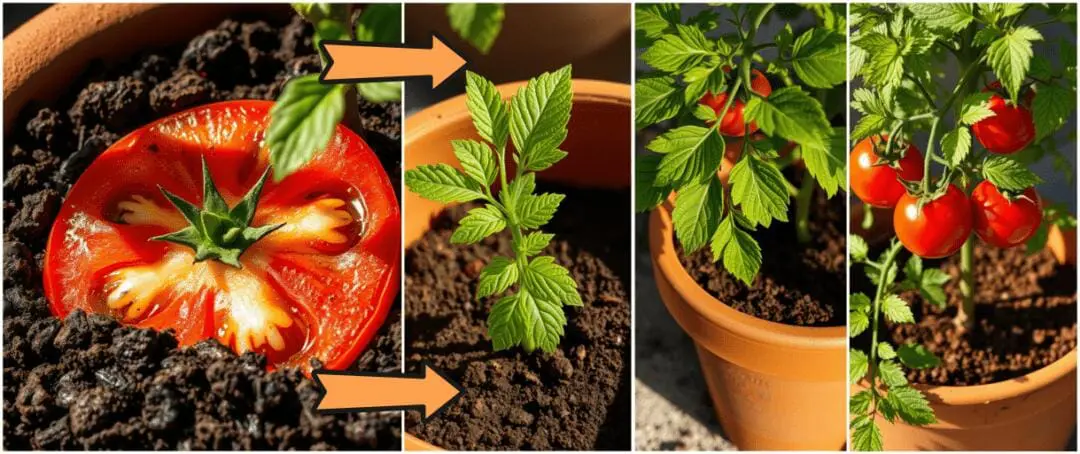
Did you know that you could have an endless harvest from a single slice of tomato? It’s just one of those things you plant once, then harvest forever.
You don’t need any store-bought seeds or special tools. If you’ve got one tomato, you’ve got everything you need to start a thriving plant.
Gardeners have relied on this trick for generations. With the right conditions, that single slice can sprout into a strong, productive plant. And you don’t have to spend a dime!
It’s an old-school, overlooked way to turn scraps into abundance. With the right conditions, that single slice can sprout into a strong, productive plant – all without spending a dime.
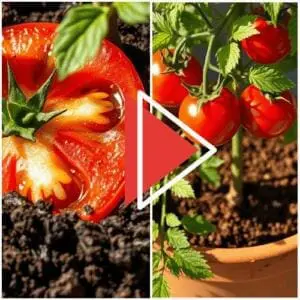
🍅Can You Grow A Tomato Plant From a Tomato Slice? Why This Method Works
Yes, you can grow tomatoes from a slice! It might sound like a gardening hack from a science fiction movie, but it’s all about working with nature. Here’s why it works – and why it’s actually pretty awesome:
In the wild, tomatoes are natural survivors. They don’t wait around for gardeners to plant them. They drop their seeds when they fall to the ground, and the environment does the work of getting them to sprout. By planting a tomato slice, you’re mimicking this process. Just skipping the messiness of decomposing fruit! That juicy slice contains multiple seeds, each with the potential to grow into a plant.
What’s the science behind it?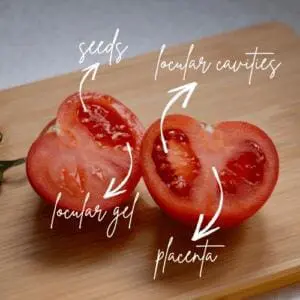
Tomato plants self-pollinate, with fertilized flowers developing into fruit containing locular cavities filled with seeds.
As the fruit ripens, the seeds within the gel of the locules become ready for dispersal. Animals consume the fruit, spreading the seeds, which then germinate in new locations, continuing the cycle.
Tomatoes are incredibly clever plants. The idea of growing from a slice might seem strange, but it’s really just the plant doing what it’s been doing for centuries.
🍅Growing Tomatoes From Slices – What You Need
One of the best parts about this trick? With just a single tomato slice and a little patience, you’ll be on your way to tasty homegrown tomatoes in no time! Here’s what you’ll need:
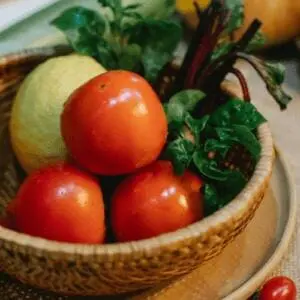
🌱A ripe tomato
If you are wondering if you can grow tomatoes from store bought tomatoes, the short answer is yes. In theory, any variety will do. It all depends on what your expectations are.
Heirlooms are where it’s at if you want something special. They’re the ones that grow true to the parent plant, so if you plant a slice of Brandywine, you’ll actually get more Brandywines.
They’ve got flavor, character and some of the prettiest colors you’ll see in a garden.
Cherry tomatoes are a close second in my book, especially for small spaces or impatient gardeners like me. Sungold, in particular, is like candy in tomato form. And it grows like it’s got somewhere to be.
Store-bought tomatoes? They’ll still grow, but since most of them are hybrids, you don’t always know what you’re going to get. I once planted a slice from a supermarket tomato and ended up with a funky little plant that produced these odd-shaped tomatoes.
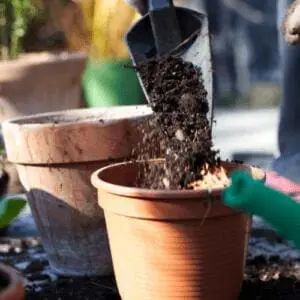
🌱A pot or container
These days, I like to start mine in a pot about six inches deep. Not too big, not too small. Just enough room for the roots to stretch out a bit without swimming in soil. You can use a regular nursery pot if you’ve got one, but honestly, I’ve used everything from yogurt containers to cut-down milk cartons. As long as there’s drainage, you’re good.
That part’s important. Drainage. Tomatoes hate sitting in soggy soil. If your container doesn’t have holes in the bottom, water will pool up and rot the seeds before they ever have a chance to sprout. I’ve made that mistake before – came back to check on my seedlings and found a swampy mess instead.
If you want to go the fancy route, unglazed clay pots or fabric grow bags are great, especially if you plan on keeping your tomatoes in containers longer term. They let the soil breathe. But for that first little sprouting stage? Something simple and well-drained will do just fine.
🌱Potting soil
You’d think that growing from a slice wouldn’t need much more than the basics, right? A little water and a sunny spot. But the soil? That’s where it all starts. Without the right foundation, those little roots won’t grow as deep, strong or healthy. It’s like trying to build a house on a shaky foundation. It’ll work for a while, but it’s not going to last.
So, I mixed in the soil some rich compost, which is like a vitamin boost for the garden. I could already tell the difference in how the soil felt. Loose and crumbly, almost soft. This is exactly what tomato seedlings need, no matter if they’re coming from a store-bought slice or an heirloom you grew yourself. If the soil’s dense and packed, those little roots can’t spread and get the nutrients they need. So, I made sure to work in compost, a bit of organic matter like shredded leaves, and some bone meal to give them that balanced nutrition.
The real trick, though, is making sure it’s not too rich. Tomatoes love good, nutrient-packed soil, but they’re picky about how much nitrogen they get. Too much, and all you’ll get are tall, leafy plants with no fruit. So I kept it light. Just enough to keep them happy without going overboard. A little aged manure goes a long way here.
Once I made sure that the soil was in good shape, I didn’t just toss the slices in and hoped for the best. I planted them deep about half an inch under the soil, just enough to let the roots get a grip.
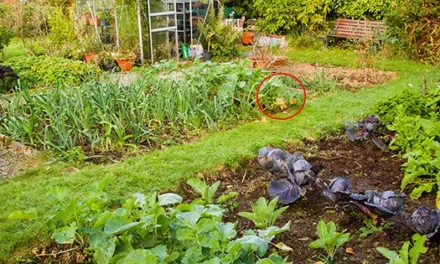
And instead of planting straight into the ground, I tucked those slices into one of my raised beds. The soil stays warmer there, drains better and it’s way easier to work with, especially after a rain. But what really made the difference this year was adding a simple hoop house over the top. Just a few bent pipes, some clear plastic, and a bit of patience to set it up right.
I learned how to build this using guidelines from a book I came across recently. In here, you can also find tons of Amish hacks that can help you not only survive, but thrive, during a long-term blackout, why the Amish make an ash circle around their plants, the companion planting techniques that can help you grow twice as much food on the same piece of land and so many other methods that have been kept a secret… until now. This Amish was ex-communicated for revealing this life-saving information. See what he had to say here!
🌱A warm, sunny spot
Tomatoes need a warm, sunny spot to thrive, especially when you’re growing them from slices. 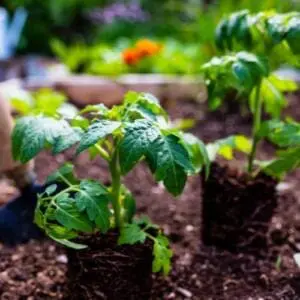
I learned early on that they really aren’t happy unless they’re soaking up at least six hours of direct sunlight each day.
Without enough sun, they’ll grow slowly, the leaves might get limp, and you’ll be lucky to see any fruit. I once placed my seedlings in a shady spot and, to be honest, they barely grew. It didn’t take long for me to realize that tomatoes need that full sun to flourish.
If you’re using pots, it’s even more critical. Containers heat up quickly and dry out faster, so sunlight helps both the plants and the soil stay warm, which is exactly what your tomatoes need. When you find that sweet spot, you’ll see your plants reach toward the sun, their leaves turning a vibrant green, and before you know it, you’ll spot those first little flowers. That’s when you know you’ve got it right.
🌱Water
Watering is one of the most important parts of growing tomatoes from slices, especially in the early stages. The slices need consistent moisture to sprout and establish roots, but too much water can be just as harmful as too little.
➡️ Why You Should Never Store Your Water Next to a Fence ⬅️
When I first tried this method, I kept the soil evenly moist, checking it every day to make sure it wasn’t drying out. Not soaked – just damp, like a wrung-out sponge. That’s the sweet spot. If the soil dries out too soon, those tiny seedlings might not even get a chance to break through.
🍅How Do You Grow A Tomato Plant From a Slice? My Step-by-Step Guide
I didn’t set out to become the “tomato slice” person, but once you’ve grown a thriving plant from what most folks would toss in the compo
st, people start asking questions. “Wait… from that?” they’ll say. Yep. That’s all it takes.
Of course, it’s not just about burying a slice and hoping for the best. There are a few little things that I’ve learned over time – things that make this trick actually work. Nothing complicated, just small habits that help those slices sprout, root, and eventually give back more than you even expected. Here are the steps I usually follow, once I’ve chosen the tomato I wanted for my seedlings:
Cut the Tomato
I like to aim for 1/2-inch thick slices. Nothing too thin, but thick enough to give the roots a solid start.
Don’t stress over the seeds. They’re not just there to be eaten; they’re there to grow. Just cut the slices, and you’ll see them start to work their magic in the soil. I’ve found that the thicker slices seem to do better – more surface area for the roots to spread out from.
➡️ 10 Life-Saving Foods That Grow Without Soil and Sunlight ⬅️
Prepare Your Soil
Next, think about where these slices will call home. I’ve always had good luck with loose, nutrient-rich soil.
If you’re planting in the garden, keep in mind what I told you before about mixing your soil with some compost and manure. If you’re using containers, again, aim for a deep, well-draining pot. The last thing you want is a soggy slice that rots instead of rooting. Loamy, fluffy soil is what your tomatoes will thank you for.
Now, here’s something a little unexpected I picked up. Apparently, the Amish have a trick that goes way back: they bury a fish head under their tomato plants. Sounds odd at first, I know, but it actually makes a lot of sense. As the fish breaks down, it slowly releases nutrients right where the roots need them most – phosphorus, calcium, even a bit of nitrogen. All naturally. It’s like giving the plant a slow-release fertilizer, no chemicals needed.
I tried it once, just out of curiosity, and I swear those plants shot up faster than the rest. You just have to bury the fish deep enough so nothing comes sniffing around. It’s one of those old-time methods that works quietly under the surface (literally). See what else the Amish bury in their gardens to make their plants grow faster from here.
Plant the Slice
Now comes the fun part! Gently place each slice flat-side down into the soil, pressing it in lightly. Just deep enough to tuck the edges under. It’s like giving that slice a little ”bed” to settle into.
I always make sure the slice has good contact with the soil, but I don’t bury it too deep. Let the slice rest just under the surface, where it can start its transformation.
Water Consistently
Tomatoes don’t like to be thirsty, but they’re picky drinkers. Remember what I told you: the soil needs to stay consistently moist – not soggy, just damp. I check the soil every day to make sure it’s not drying out, but I don’t overwater either. Once the roots start to grow, and you begin to see little green shoots peeking through, you can water a little more deeply, but by then, the tomato is ready for a bit of a stronger foundation.
Provide Enough Sunlight
I make sure my plants get at least 6 hours of direct sunlight a day, or more if possible. The sun is what makes them thrive, so don’t skimp on the exposure. If you’re growing them in containers, move them around to follow the sun’s path. Tomatoes aren’t picky about their location as long as they get that warm light. Without enough sun, they’ll stretch too tall and weak, trying to find their way to it.
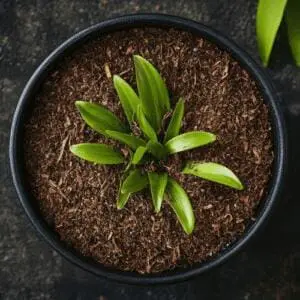
Watch for Growth
After a couple of weeks, you should start seeing the magic happening. Tiny green sprouts will start to push up from the center of the slice. It’s a slow process, but once those first true leaves appear, you’ll know the plant is well on its way. I always keep a close eye on my seedlings and thin out the weaker ones. Leave the strongest to flourish. If things get crowded, don’t hesitate to move the extras into new pots or beds.
Shift to Deep Watering
As your plants grow, the watering routine shifts. Once they’re established, I switch to deep watering about once a week. This encourages the roots to stretch deeper, making them stronger and more resilient.
One thing I’ve learned: water at the base, not on the leaves. Wet foliage can invite all sorts of problems, from fungus, to mildew and blight. And if I can, I water early in the morning so any moisture on the surface has time to dry before nightfall.
Troubleshoot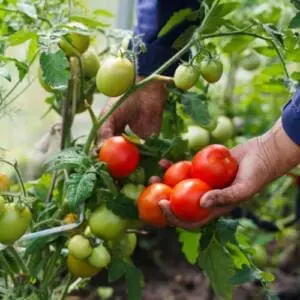
Things don’t always go perfectly, and that’s where the troubleshooting comes in. If your plant looks weak or leggy, it might not be getting enough sun. Move it to a brighter spot and make sure it’s soaking in those rays.
If it’s wilting or turning yellow, overwatering might be the culprit. Adjust your watering routine and let the soil dry out a bit before watering again. It’s all about balance and keeping an eye on your plant’s needs.
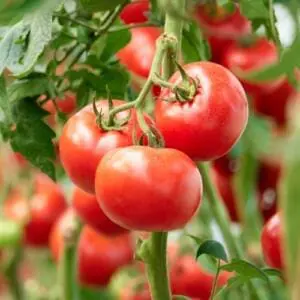
Harvesting
And then, finally, the moment arrives: you get to harvest your tomatoes! When they’re ripe, they’ll feel firm with a little give. Pick them gently from the plant, and you’ll be rewarded with a fruit that started from nothing more than a kitchen slice.
🍅From Slice to Bounty: Enjoy the Fruits of Your Effort!
It all starts with a slice, and before you know it, you’re picking juicy tomatoes from a plant that began as a kitchen scrap. Who would have thought that you can turn something so simple into a delicious, homegrown harvest?
So, grab your slice and watch the magic unfold – your tomato harvest is just around the corner. Let me know how your journey went in the comments, I can’t wait to hear your stories!
You may also like:
The Easiest Way To Tell Apart Edible Plants and Their Poisonous Lookalikes (Video)
These Plants Are Killing Your Tomatoes
10 Tomato Growing Tips For Beginners


