Destroyed soil structure. Blackened veggies. Cracked irrigation pipes. These used to be common occurrences in our homestead during winter. But I’m happy to announce – NO MORE! Here’s how to winter-proof your garden.
Last winter, when temperatures plummeted to -15°F, my winter-proofed garden thrived while my neighbor’s $2,000+ greenhouse system failed. Crazy to think about, but that’s beside the point.
With a few simple and effective DIY solutions, you too can build a resilient ecosystem.
The best part? You can source most materials right in your recycling bin.
So, without further delay, here’s what to do:
Prepare Your Garden Soil for Winter
Years of working my clay-heavy soil have taught me that winter preparation actually begins in late summer. I learned this timing through a costly mistake during my second year of homesteading when I waited until the first frost warning to start my winter prep.
By then, the soil was too cold and wet to work effectively.
Test and Adjust Soil pH 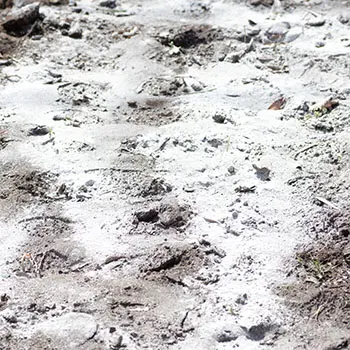
My most valuable garden tool isn’t my trusty spade – it’s my pH meter. I discovered this after watching my blueberry bushes struggle for three seasons before realizing my soil’s pH was completely wrong for acid-loving plants. Now, I test my soil in multiple locations every September, creating a detailed pH map of my garden.
Last fall, my tests revealed surprisingly acidic soil in my vegetable beds (pH 5.4), likely from years of pine needle mulch. I’ve found that adding limestone in autumn gives it time to integrate with the soil before spring planting.
For every half-point increase needed, I work in about 5 pounds of limestone per 100 square feet. This systematic approach has dramatically improved my spring germination rates.
Related: Soil Testing Methods Used By Pioneers That Still Work Today
Mulching for Winter Insulation
Through careful temperature monitoring, proper mulching can maintain soil temperatures up to 15 degrees warmer than exposed ground. My mulching strategy has evolved through years of experimentation. Here’s what I’ve found works best in my garden.
For vegetable beds, I layer compost followed by straw about 4-6 inches deep. This combination provides excellent insulation while enriching the soil. Last winter, my mulched beds maintained temperatures above freezing even when air temperatures dropped to 10°F.
Around my fruit trees, I use wood chips in a 3-foot radius, being careful to keep them away from the trunk. This practice saved my orchard during last year’s polar vortex when temperatures plummeted to -20°F.
While other local orchards lost trees, my mulched specimens survived with minimal damage.
Related: This Is Why You Should Grow Living Mulch In Your Garden
Cover Crops 
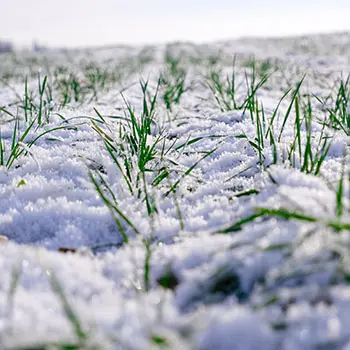
My greatest soil protection breakthrough came when I started using cover crops. I remember walking through my winter garden after the first snow, noting how the areas planted with winter rye remained green while everything else lay dormant.
Now, I plant different cover crops depending on my soil’s needs: Winter rye works wonders in my heavy clay areas, and its robust root system breaks up compaction naturally.
In beds where I’ve detected nitrogen deficiency through soil tests, I sow a mix of hairy vetch and clover. The nitrogen-fixing abilities of these plants have reduced my fertilizer needs by nearly 40% in subsequent growing seasons.
Adding Compost and Organic Matter
Early in my homesteading journey, I underestimated the importance of fall composting. Now, my fall compost application is as crucial as spring planting. I’ve developed a layering system that maximizes decomposition even during winter months.
In October, I spread a 2-inch layer of partially decomposed compost across my beds. Over this, I add shredded leaves collected from my property. The combination creates a protective blanket that gradually breaks down, feeding the soil throughout winter.
My soil tests have shown a consistent increase in organic matter content from 2% to 6% over five years using this method. This complex yet crucial process of winter soil preparation has transformed my garden’s productivity.
When spring arrives, instead of fighting with compacted, nutrient-depleted soil, I find rich, friable earth teeming with earthworms and ready for planting.
Related: DIY Worm Compost Tower
Protecting Plants from Frost and Snow Damage
Here are foolproof methods for cold protection. My greenhouse thermometer once registered -5°F outside while maintaining 40°F inside using these techniques.
Cold Frames and Cloche Tunnels 
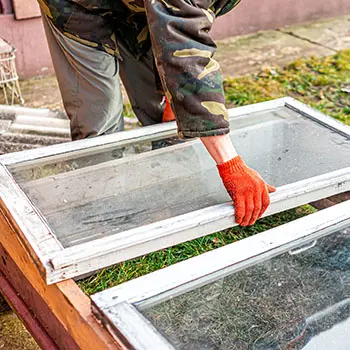
I’ve had great success using hinged cedar frames with polycarbonate panels. This setup lets me harvest fresh spinach and kale all through January, even when it’s 20°F outside. Adding soil heating cables takes it a step further. Last winter, I kept the soil in my cold frames at 45°F, which kept cold-hardy greens growing all season long.
Row Covers and Frost Blankets
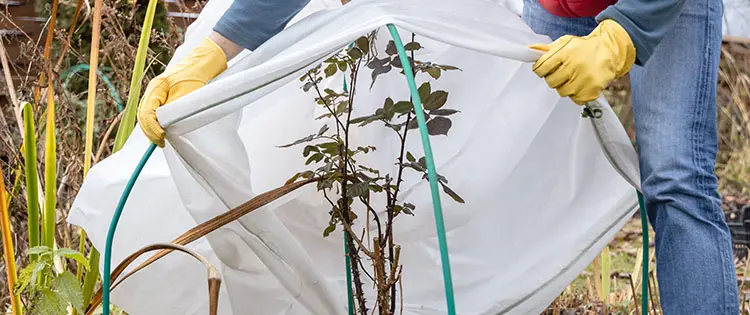
Layering protection is key. I start with a lightweight row cover directly over the plants. On really cold nights, I add a heavier frost blanket. This system worked like a charm last year, saving my early spring peas from a surprise frost in April.
Watering and Irrigation in Winter
Watering at the right time matters. About two weeks before the ground freezes, I give my perennials a deep soak. This prevents winter burn but avoids waterlogging that can cause root rot.
By mid-October, I blow out my irrigation lines with compressed air. For winter watering, I rely on a gravity-fed system that drains easily.
Protecting Garden Structures and Tools
Each fall, I prep my tools by cleaning, sharpening, and oiling all metal parts. I store them in a humidity-controlled shed. Thanks to this habit, my pruning shears have stayed rust-free for over 10 years.
Managing Moisture Levels in Winter
Cold, dry air and winter winds can pull moisture from plants, leaving them vulnerable to dehydration—even with snow cover. 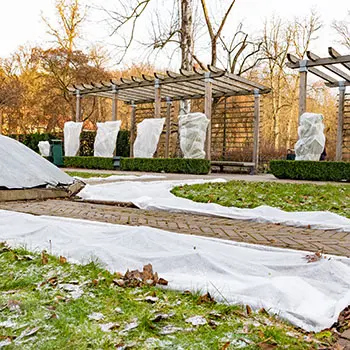
I use a simple system to keep soil moisture in check during the winter. Monitoring snow cover is the first step. If there’s less than four inches of snow, I check the soil moisture because shallow snow doesn’t insulate well. Without enough insulation, the ground can dry out quickly. However, if the snow is deeper than four inches, I focus on its insulating properties. Deeper snow keeps the ground warmer and helps retain moisture, so I usually don’t need to water in those conditions.
When I do water in winter, I follow a few key rules. I only water when temperatures are above 40°F to avoid freezing the soil or damaging the roots. Timing is important too. I water between 10 a.m. and 2 p.m. so the moisture has time to soak in before the nighttime freeze. I also use tepid water, which I store in my greenhouse. This prevents shocking the roots with cold water.
Related: How To Keep Your Garden Alive During Winter
To stay on top of moisture levels, I rely on a few tools. A soil moisture meter gives me quick readings to decide whether to water. My rain gauge tracks how much moisture is added by winter rain or melting snow. I also use a weather station to monitor temperature changes, humidity, and precipitation. These tools help me adjust my watering routine to the changing winter conditions.
Last winter, during a January thaw, I noticed my evergreens showing signs of dehydration, despite the snow cover.
My soil moisture readings were just 15%—well below the 25% minimum they need. So, I did a careful winter watering session, with tepid water, that boosted the soil moisture and saved them from further stress.
By following this simple system, you’ll create a winter-ready garden that holds up even in the toughest conditions.
Are you ready?
Do This To Your Wood Stove Before Winter
How to Build a Food Stockpile That Never Spoils (Video)
30 Survival Uses For Wood Ashes You Never Thought Of
Livestock In Winter: Mistakes Even The Most Advanced Homesteaders Make

