If you want a strong harvest, it starts with healthy soil. But over time, your land can lose nutrients and structure, which is making it harder for your crops to thrive.
The good news is, bringing your soil back to life isn’t as complicated as you might think. In fact, there are a few old-school practices, mostly overlooked by modern homesteaders, that can turn worn-out soil into a thriving foundation for your backyard. And they don’t involve high costs or harsh chemicals.
Let’s discover them.
The Worm Migration Method
You do not always need to purchase worms to populate your garden; you can encourage a natural colonization from the fertile, worm-rich areas of your land to the depleted patches.
This method leverages earthworms’ natural behavior to move toward food and ideal habitats, effectively letting them do the work of tilling and fertilizing your soil for you.
Start by identifying a “source” area on your property where worms thrive, such as a compost pile or a shaded, moist spot under trees. Then, target the “destination”: your struggling garden bed or a new planting area. To build a bridge for them, you lay down a continuous, moist pathway of organic material between these two points.
Use materials like soaked cardboard, a thick layer of straw, or old burlap sacks. Keep this pathway consistently damp and covered to protect it from the sun and wind.
To entice the worms to travel, you place generous handfuls of their favorite food along the route and in the destination bed; mashed pumpkin, soaked grain mash, or coffee grounds work exceptionally well.
The worms will detect this food source and gradually migrate toward it, aerating the soil with their tunnels and depositing nutrient-dense castings as they go. This slow, steady migration builds a self-sustaining worm population that will continuously improve your soil structure and fertility from within.
Biochar Infusion with Wood Vinegar
Instead of burning your old wood scraps into ash, you can transform them into biochar, a porous carbon substance that acts like a permanent hotel for soil microbes and nutrients.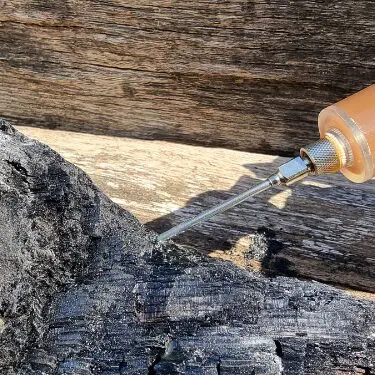
Making biochar requires a controlled burn in a low-oxygen environment, which you can achieve by using a metal drum with a lid; the process, called pyrolysis, converts the wood into a brittle, black carbon structure without reducing it to ash.
Once you have your biochar, you must “charge” it before adding it to your soil, as raw biochar can initially rob nutrients. This is where wood vinegar, also known as pyroligneous acid, becomes essential.
You collect this liquid by-product during the smoldering of wood, condensing the smoke through a metal pipe into a container.
Mixing this wood vinegar with your biochar—using about one part vinegar to ten parts water for soaking—infuses the char with nutrients and beneficial compounds.
If you want to take this one step further, the Amish Ways Academy shows you how to use these time-tested, low-tech methods to transform your entire garden. From improving soil naturally to creating sustainable fertility systems, you’ll learn the secrets that Amish people have relied on for generations, practical knowledge you can put to work immediately in your own backyard.
It’s not just theory; it’s hands-on guidance that helps you turn every scrap of organic material into a long-lasting boost for your garden, giving you healthier plants, bigger harvests, and soil that regenerates itself year after year.
The Forgotten “Weed Tea” Fertilizer Method
You likely spend hours pulling invasive weeds, seeing them as enemies stealing resources from your crops. What if you could turn that problem into the solution?
Those very weeds are nutrient miners, pulling minerals from deep in the subsoil and concentrating them in their leaves. By brewing them into a potent “weed tea,” you can capture those nutrients and return them directly to your garden beds.
Start by filling a five-gallon bucket about halfway with the weeds you’ve pulled. Focus on nutrient-dense varieties like comfrey, which is famous for its high potassium content, or stinging nettle, a dynamic accumulator of iron and nitrogen.
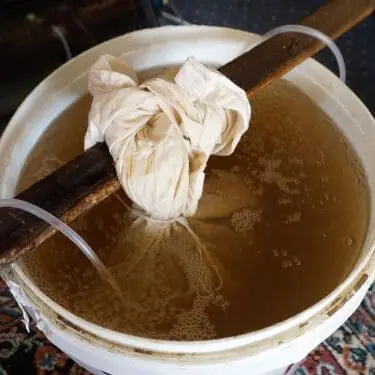
Avoid using any weeds that have gone to seed, as you don’t want to spread them later. Pack the weeds in tightly, then fill the bucket to the top with water—rainwater is ideal, but tap water that has sat out for a day to dechlorinate works fine.
Cover the bucket with a breathable cloth to keep insects out and let it steep. You will notice a smell developing as fermentation begins; this is normal and indicates the process is working. Stir the mixture every other day for about two to three weeks, until the plant matter has broken down and the water turns a dark, tea-like color.
Once ready, strain out the solid matter and add it to your compost pile. Dilute the remaining liquid fertilizer at a ratio of one part tea to ten parts water. When you apply this to the base of your plants, you are essentially feeding them a recycled, liquid vitamin shot made from the richest elements of your own land.
Don’t Forget About The Water
Even the best soil can’t do its job if it’s dry or poorly hydrated. Water is more than just a drink for your plants. It’s what carries nutrients, supports soil microbes, and keeps the whole garden ecosystem alive. Too little, and your plants struggle; too much, and nutrients wash away while roots suffocate.
The trick is slow, deep watering. Instead of quick surface soaking, let the water sink in gradually. This encourages roots to grow deeper and stronger, making your plants more resilient and better able to access the nutrients you’ve worked so hard to put back into your soil. Cover your beds with straw, leaves, or grass clippings to hold moisture longer and slowly feed the soil as they break down.
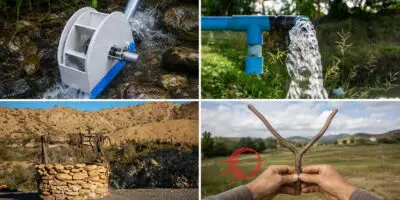
Rainwater is ideal for this. It’s free of chemicals and perfectly balanced for your soil life. Collect it in barrels or a cistern, then apply it slowly to your beds. You can even combine this with your clay water or diluted weed tea to feed minerals and nutrients along with hydration. You can also use a pressurized water collection system like this one, that’s capable of storing 165 gallons of water that would otherwise just go to waste. Because the water is stored vertically, it’s also pressurized by gravity, and you’ll be able to use it without a pump or siphon. You could use this project for a lifetime. And if you also connect it to a water filter, then you will also have clean water to drink and cook with. You can find out how to make it from here.
By paying attention to how, when, and what kind of water you give your garden, you’re doing more than keeping plants alive. You’re keeping your soil alive, too. And healthy soil is the secret behind bigger, stronger harvests.
If you want something that goes beyond storage and filtration, there’s a modern device that works off the same principle nature uses. It pulls moisture straight from the air and turns it into clean, drinkable water. This DIY water generator can produce up to 40 gallons a day, completely off-grid. It’s simple to assemble, runs on free solar energy, and gives you a dependable water source no matter what happens.
Clay Water Treatment
If your plants seem lethargic and your soil feels lifeless, the issue might be a lack of trace minerals, something modern fertilizers frequently miss.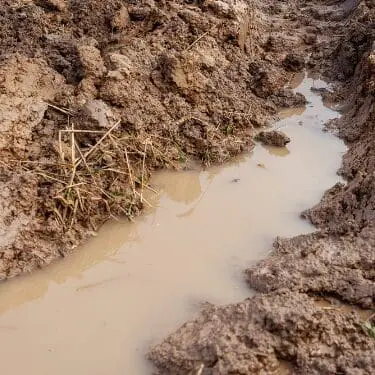
To replenish these essential elements, you can use a method as old as agriculture itself: clay water. This technique involves steeping clay rich in minerals to create a potent solution that feeds your soil directly.
You start by sourcing clay from a subsoil layer on your property or a nearby creek bank; just ensure the clay is pure and without chemical contamination. Powder a few chunks of this clay by letting them dry completely and then crushing them with a hammer.
Stir about one cup of the clay powder into a five-gallon bucket of rainwater. Let this mixture steep for at least 24 hours, which allows the minerals to solubilize into the water. You then apply this mineral-rich water directly to your planting beds, using approximately one gallon per ten square feet.
For sandy soil that struggles to hold nutrients, the suspended clay particles will also help bind the sand together, improving its structure and water retention capacity. This process balances pH over time, moving acidic or alkaline soil toward a more neutral state that most crops prefer. Applying clay water every four to six weeks during the growing season can steadily rebuild your soil’s mineral foundation, giving your plants the diverse nutrition they need to resist disease and produce abundant harvests.
🌿 Take Your Backyard to the Next Level
If you want to supercharge your garden even further, there’s a system that takes everything you’ve just read and multiplies it.
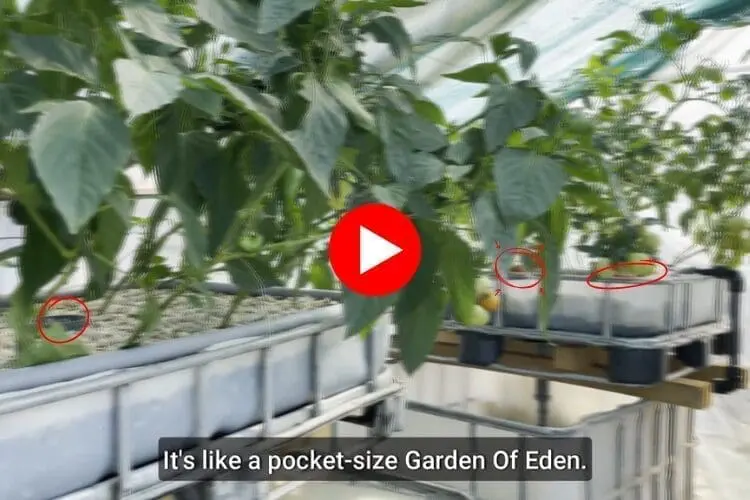
Inspired by methods used in some of the driest, most dangerous places on Earth, this system lets you grow high-calorie, nutrient-rich food in minimal space, without backbreaking labor. It’s a “pocket-sized Garden of Eden” that keeps your family fed even when everything else around you fails.
This is a proven method that turns struggling soil and tiny plots into self-sustaining, hyper-productive food generators without relying on store-bought chemicals. It’s exactly what homesteaders like you need to protect your harvest, your family, and your freedom from corporate control and failing food systems.
It also comes with 3 FREE bonus guides that prepare you for real-world challenges:
- How to secure clean water for your family in any situation
- How to thrive even if supply chains fail or the economy collapses
- What items will become invaluable when the next crisis hits
➡️ Discover the High Output Pocket Farm here and claim your FREE bonuses right now ⬅️
Every day you wait is a lost harvest. Don’t let drought, depleted soil, or food scarcity steal what you’ve worked so hard to grow. With this almost invisible “food generator”, you’ll turn every inch of your soil into a productive, nutrient-rich powerhouse and finally get the harvest you deserve.
Keeping Roots in the Ground Year-Round
Nature abhors bare soil, and when you leave your garden beds empty between plantings, you inadvertently starve the entire soil ecosystem.
The secret to continuously nourishing this underground world is to maintain a living root in the ground throughout the year, a practice that feeds soil microbes with a steady supply of exudates, which are sugars and acids secreted by plant roots.
You achieve this by planting cover crops, often called “green manures,” during seasons when your main crops aren’t growing. For a fast-growing nitrogen boost in the spring or fall, you can sow crimson clover or annual ryegrass.
If you need to break up compacted subsoil over a longer period, daikon radish or sweet clover will send deep taproots down to naturally aerate the earth. Instead of tilling these plants under at the end of their cycle, you can use a technique called “crimping,” where you break the plant stems at the base to terminate them while leaving the root structure intact to decay in place.
This creates a protective mulch on the surface and leaves behind networks of organic matter for worms and microbes to consume. Another approach is to use living mulches like low-growing clover between your crop rows; this suppresses weeds, reduces water evaporation, and constantly feeds the soil biology right alongside your vegetables.
By ensuring something is always growing and feeding the soil, you mimic the perennial ecosystems of a forest floor, turning your homestead into a self-sustaining and resilient living system.
If you’re rebuilding your soil to support a more self-sufficient garden, it’s also worth growing plants that actively improve the land while giving you practical benefits at the same time. Medicinal herbs are some of the most practical additions you can grow. Deep-rooted varieties like calendula, chamomile, and yarrow not only protect the soil from erosion but also improve its structure and microbial balance over time. Their roots penetrate and loosen compacted layers, creating channels for air, water, and nutrients to reach deeper soil horizons. As their leaves die back or are mulched, they return valuable organic matter to the soil, feeding beneficial microbes and helping to retain moisture. Their flowers attract pollinators and other helpful insects that keep your garden productive and balanced, while also providing a steady harvest of flowers for teas, tinctures, and salves.
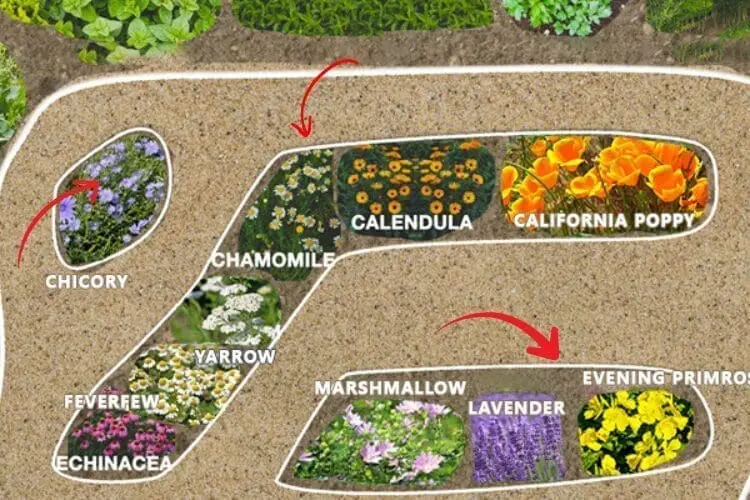
What’s more, these herbs aren’t just good for the soil. They’re incredibly useful around the homestead, too. Calendula is prized for soothing skin irritations, minor burns, and cuts, while chamomile can be used as a calming tea to support digestion and sleep. Yarrow has been relied on for generations to help with wounds, inflammation, and even mild fevers. Growing these herbs gives you hardy, low-maintenance plants that support a healthier garden and provide practical benefits your family can use every day.
To make getting started even easier, this kit includes these non-GMO, carefully selected seeds and comes with step-by-step instructions for planting and caring for each one of them. Every kit is put together by a top-trusted herbalist, so you get reliable, high-quality plants that strengthen your soil, attract pollinators, and provide natural remedies right from your backyard.
🌱 Supplies are limited, so grab your kit today and secure your patch of herbs before it’s too late!
You may also like:
The Black Soil That Doubles Your Harvest
OTC Meds In Your Backyard: 10 Plant Alternatives (Video)
How To Choose The Best Plants For Your Soil Type
How To Use Weeds To Read Your Soil


