Collecting rainwater is nothing new.
Our ancestors did it long before us.
It’s surprising how much water goes to waste these days, especially when the benefits of conservation are so clear. By collecting and storing rainwater, you can enjoy lower water bills, have a reliable backup during dry spells, and achieve greater self-sufficiency in managing your homestead’s water needs.
For homesteaders, it’s a no-brainer, yet many of us still miss the mark. Sure, installing a rain barrel under your roof is easy, but what if you don’t have gutters? Fortunately, there are plenty of ways to collect rainwater without them – and some don’t even need a roof either.
Here’s how:
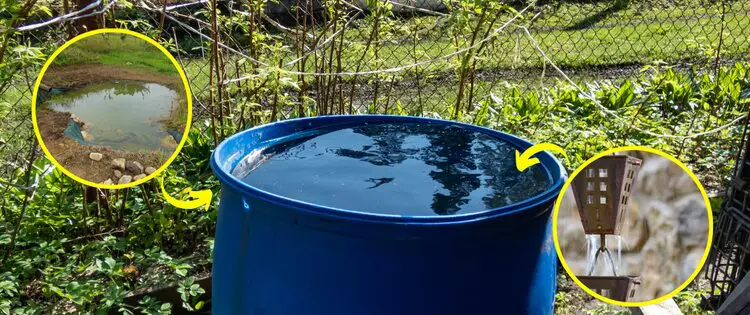
Rainwater Diverter From a Sloped Roof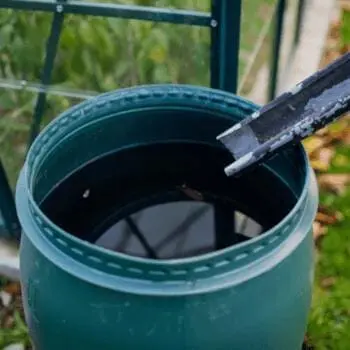
This simple method has been a game-changer for my barn roof. It’s easier than pie to set up and works like a charm.
To get started, you’ll need an 8-foot length of 4-inch PVC pipe as the backbone of your system, along with PVC end caps and elbows to direct the water flow. Mounting brackets will help keep everything secure, and a 55-gallon food-grade barrel will serve as your water storage.
Begin by cutting the PVC pipe to fit under your roof’s eave, making sure it has a slight downward tilt for proper drainage. Cap both ends and attach an elbow at the lower end, turning the pipe into a functional water slide. Secure the pipe under the eave using mounting brackets. Place your barrel under the elbow to catch the runoff, and install a small mesh screen at the inlet to filter debris. And just like that, your rainwater collection system is up and running!
Related: States That Will Punish You for Harvesting Rainwater. Do You Live In One Of Them?
Tarp Method: Large-Scale Collection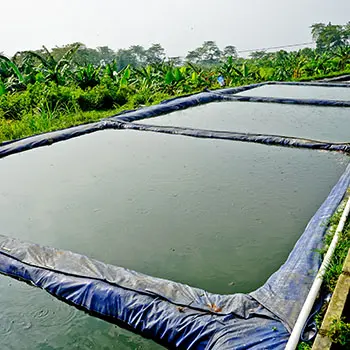
Got a structure without a proper roof? No sweat. This method’s perfect for my greenhouse, and it’ll work wonders for you too.
For this setup, you’ll need a 20′ x 20′ heavy-duty waterproof tarp, as big as possible to catch maximum water, along with 100 feet of strong rope and 8 heavy-duty stakes to secure everything in place. You’ll also want 2 or 3 large collection barrels, depending on how much water you plan to capture.
Start by tying the tarp between trees or sturdy posts, arranging it in a funnel shape—almost like a giant slip-n-slide—to channel the water effectively. Ensure the tarp is angled steeply enough for the water to flow downward easily. Stake down the edges tightly to prevent any sagging. Finally, place your collection barrels at the lowest point of the funnel, allowing gravity to do its work in directing the water into the barrels.
Ground Collection with Ponds and Basins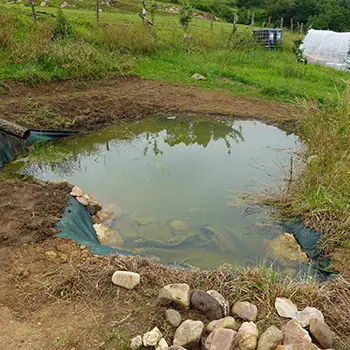
This method is straight out of Mother Nature’s playbook. It’s perfect for sloped areas and adds a touch of beauty to your homestead.
Start by grabbing a shovel to dig a shallow basin, about 2 feet deep, in an area where water naturally collects—think of it like crafting a miniature lake. Use a durable pond liner; recycled billboard vinyl is a great option because it’s as tough as nails.
Line the basin, making sure to extend the liner beyond the edges. Install a PVC pipe as an overflow, creating a spillway that leads to a storage tank for those heavy downpours. Finally, edge the basin with interesting rocks to secure the liner and give it a natural, attractive look. It’s both functional and aesthetically pleasing—a perfect combination!
I’ve added water plants to my collection pond.
They help filter the water and attract beneficial insects.
Related: How To Find An Underground Water Source On Your Property
Rain Chain System with Collection Buckets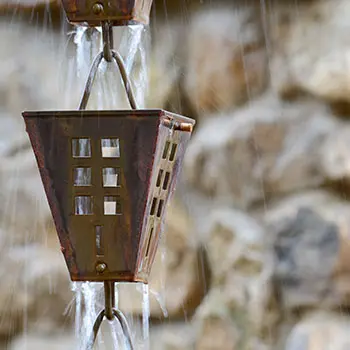
Who says water collection can’t be easy on the eyes? This method adds a touch of whimsy to your setup.
I’ve used old wine bottles to create a unique, colorful rain chain. It’s a conversation starter and a water collector all in one!
Plastic Sheet Water Harvester
This quick-deploy method is perfect for unexpected dry spells or temporary structures.
Start by laying a 15′ x 15′ heavy-duty plastic sheet on a sloped area, securing the edges firmly with bricks or sandbags to keep it in place. Shape the sheet to form a large funnel, guiding the water into a central channel for efficient flow. At the lowest point of the slope, large collection containers are positioned to serve as catch basins for the rainwater. This setup ensures maximum water capture with minimal effort.
I usually use a dark-colored sheet to prevent algae growth and minimize evaporation.
Natural & Passive Collection Methods
Working with nature can yield impressive results with minimal effort. Let’s dive into some methods that’ll have you working smarter, not harder:
Rock Pile Collection
Who’d have thought a pile of rocks could be so darn useful? It’s like nature’s own water filter and slow cooker all rolled into one. We’re gonna arrange rocks to create a natural filtration system that slows water flow and guides it right where we want it.
To begin, lay the landscape fabric on a slight slope, which will serve as the base for your rock river. Start placing the larger rocks at the top, gradually working down to smaller pebbles as you move towards the bottom.
Arrange the rocks to form small channels, guiding the water along a natural path. At the base, position your collection containers, like old buckets, to capture the water as it flows down through your handmade rock river.
Water Collecting Trees and Shrubs
Bet you didn’t know some plants are natural water collectors, did you?
Some of the best plants for water collection include banana trees, bromeliads, and gunnera. These species thrive in water-rich environments and can help gather extra moisture. To implement this, plant them near your water collection points and position containers directly under the plants’ drip lines.
The water they naturally shed can be collected and used for nearby plants or directed into a larger storage system, making the most of what nature provides.
During a decent rain, my banana trees collect about 5 gallons of water. That’s enough to keep my herb garden happy for days!
Wicking Beds for Garden Irrigation
Wicking beds are the lazy homesteader’s best friend. They’re self-watering garden beds that store rainwater in a reservoir beneath the soil.
To create a functional raised bed water collection system, start by gathering sturdy timber for the bed frame, pond liner, PVC pipes for the inlet and overflow, and gravel and soil for the base. First, build a bed frame at least 2 feet deep to allow for adequate water retention.
Line the bottom third with a pond liner to form a waterproof reservoir. Then, add a layer of gravel, and install PVC pipes for water input and overflow management. Lay landscape fabric over the gravel to separate it from the soil, and finally, fill the bed with soil for planting.
My 4’x8′ wicking bed uses 50% less water than my traditional raised beds and produces more vegetables.
Before collecting rainwater, check your local regs. Some places are pickier than others about rainwater collection.
In my neck of the woods, we can collect up to 110 gallons without Uncle Sam batting an eye.
So, which method are you gonna try out first?
You may also like:
This Is How Much Water You Actually Need
DIY Pressurized Rainwater Harvesting and Purification System (Video)
Ingenious Ways to Repurpose Old Furniture on Your Homestead
5 Ingenious Methods To Get FREE WATER In All 50 States During A Crisis
Frugal Lessons From My Grandfather Who Lived Through The Great Depression


