Years ago, I decided to start a compost for the first time.
Not really understanding just how composting worked, I took a bowl of scraps I collected in my kitchen and dumped them into a plot of dirt I had on the side of my home. This happened in the fall when red and gold leaves covered the grounds of our property.
A few months later, in the dead of winter, there were tall new stalks in the same plot where I had naively dumped my kitchen scraps. Upon taking a closer look, I was able to determine precisely what the new growth was. They were leeks. Lots of beautiful, fresh leeks!
This very unexpected gift of growth set me out on a journey to find out what else I would be able to grow from scraps successfully. It turns out you can produce quite a large variety of foods by using their scraps or seeds from items bought in-store or at your local farmers’ market.
Growing From Seed
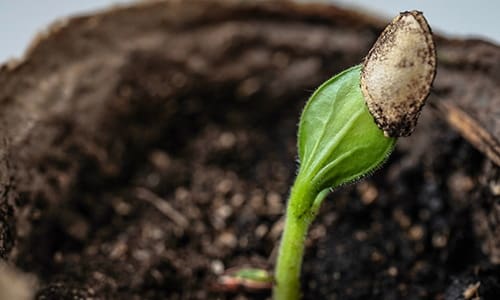
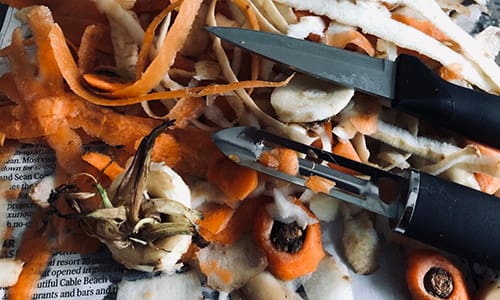
The next time you find yourself scooping out the seeds from your squash or melon, don’t be too fast to throw them in the compost! Instead, carefully clean the fibers away from the seeds and dry the seeds on a paper towel. Once the seeds are dried, you can store them and use them to plant your selected fruit or vegetables at the next optimal time.
Drying and storing seeds from store-bought or market-bought items work well with just about any member of the Gourd family, including melons, pumpkins, cucumbers, and zucchini.
Tomatoes grow from seed, of course; often by accident! Much like my personal experience with the intense and surprising growth of leeks in the winter, I have had the pleasure of being told the tale of the surprise tomato bushes time and time again. Tomato lovers toss an overripe tomato outside, or a child indulges in cherry tomatoes in the garden, and a few weeks later, property owners are blessed with beautiful fragrant tomato plants that quickly bear an abundance of fruit throughout the season.
Related: 5 Vegetables That Are Too Easy To Grow
Growing From Cut Tops
While preparing beets, draw up some water in a shallow dish and place the tops you sliced from the top of the vegetable, ensuring that the base of the beet greens is still attached. If changing the water in the shallow dish regularly, you will see regrowth in the beet greens.
The growth of the greens allows for two things; keep up with the maintenance of the beet tops to use the greens for cooking or using in salads, or plant the beets for regrowth. This method works well for most root crops, such as radishes, turnips, carrots, and parsnips.
Herbs From Stalks And Fresh Cuts
Store-bought lemongrass can be pricey. That’s why it’s an exciting discovery for lovers of this fragrant herb when they realize how easy it is to make your purchase give you a supply for months to come.
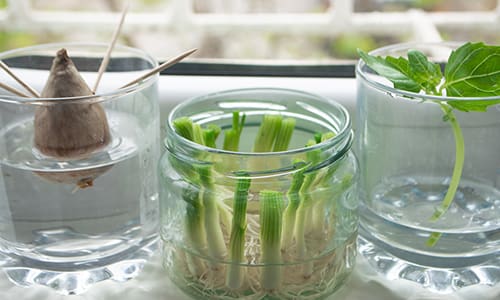
When using some of your store-bought lemongrass, be sure to save a piece of the stalk with some of the roots attached. Place the remaining stalk in a jar, submerge the roots in freshwater, and place it in direct sunlight. New growth will begin to develop on the stalks within a few days. When changing the water regularly, the roots will start to develop further. After a week or so, you can plant your stock and its newly developed roots in a soil-rich garden bed or pot. New stalks of lemongrass will grow over the coming weekends, easily doubling the amount of what you initially purchased.
This regrowth of roots from stalks works exceptionally well with celery, scallions, shallots, and garlic. However, note that frequent water change is essential, as rot can set in quickly.
Whatmore, similar steps can be taken to grow herbs from fresh cuts. Place freshly cut or purchased herbs in a glass with clean water. Change out the water regularly, and your fresh cuts will begin to sprout roots at their base! After allowing the roots to grow about one inch in length, your herbs are ready to plant and will give you new, beautiful bounties of herbs for use in your kitchen. Thyme, basil, rosemary, marjoram, coriander – you can grow whatever your heart desires!
Related: 8 Dangerous Mistakes To Avoid When Storing Your Food
Good ‘Ol Spuds
Those potatoes are beginning to sprout. Quick: plant them! Potatoes quickly grow from older spuds that have developed eyes or sprouted. Allow the sprouts on your potatoes to grow around one to two inches long and plant in rich soil. Potatoes take up a lot of space underground. Many gardeners prefer to place potatoes in large planters or even large bins for easy harvest.
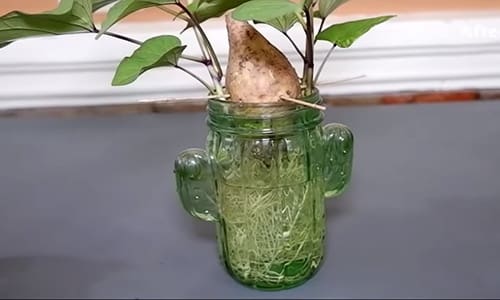
Sweet potatoes don’t sprout as easily as potatoes without a bit of push. Take an aging sweet potato and cut it in half. Suspend the sweet potato in a jar allowing only the uncut side of the sweet potato to be submerged in water without touching the bottom of the jar. After a few days, roots will develop in the water, and new sprouts/eyes will develop at the top. After the tops and bases have grown an inch or two, your sweet potato is ready to plant in the garden.
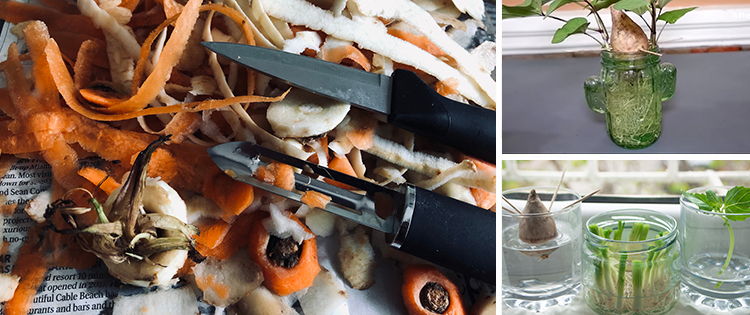
A tip for beginners: Collect a variety of jars and shallow dishes and create a “lab” by a window that receives direct sunlight. Once preparing food in the kitchen, you’ll be able to quickly and seamlessly place scraps in their appropriate containers and begin to experiment with regrowth without having to put too much thought or focus on the set-up itself.
The amount of crops that you can produce from scraps is astounding. Growing crops from scraps is a preferred method of growing comestibles for many homesteaders and gardeners. Even more exciting, you can put this practice to use for non-comestibles to help you create your flower garden, but we’ll save that conversation for another time.
Bon Appetit!
You may also like:
 The Lost SuperFoods: Book Review
What Our Forefathers Did and Built Around the House (Video)
The Ultimate Guide To Composting
Makin’ Bacon: How to Dry Cure Pork Belly


Really. Interesting. In the way you kept it to the point and simplified…..